In my previous blog posts from a few weeks ago, I shared a sketch of my vintage Singer Featherweight sewing machine that I’ve been working on. I thought it was time to share my new adventure.
I felt a bit overwhelmed in restoring my vintage sewing machine. I had no previous knowledge or experience with vintage machines let alone take them apart. That led me to doing lots of research and watching lots of restoration videos. There were times when I had to stop working on my sewing machine and take a break. More research and more videos were watched.
While I was hand turning the hand wheel over a few days, I must have loosened the dried up oil (varnish) and crud. I could see the needle bar moving slowly up and down. Like turtle-slow movements.
I had a brilliant idea of trying to use the bobbin winding feature and see how fast the motor ran. Once I unlocked the hand wheel and pressed the foot pedal, the motor was humming and the bobbin winding wheel was moving fast. This confirmed the motor was fine and again I did not see any signs of smoke.
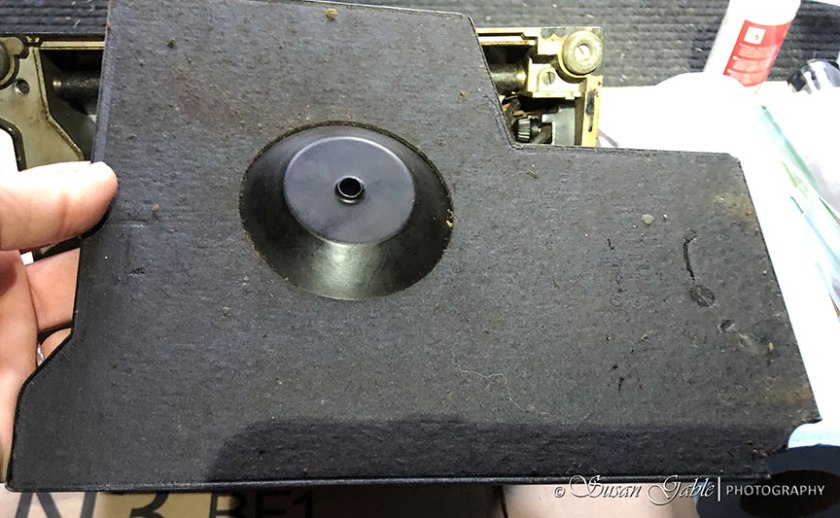
I decided not to worry about cleaning the outside of my machine and focused on cleaning and oiling the inside. To have better access to my machine, I removed the fold-up side table on the left side of my machine by removing two screws.

I started with the bottom of my machine and removed the metal oil pan plate. The oil drip felt pad was fairly new with no signs of oil or grease on the pad and very little debris. I gave it the smell test and I hardly noticed any bad smell from the pad. No need to replace the pad.
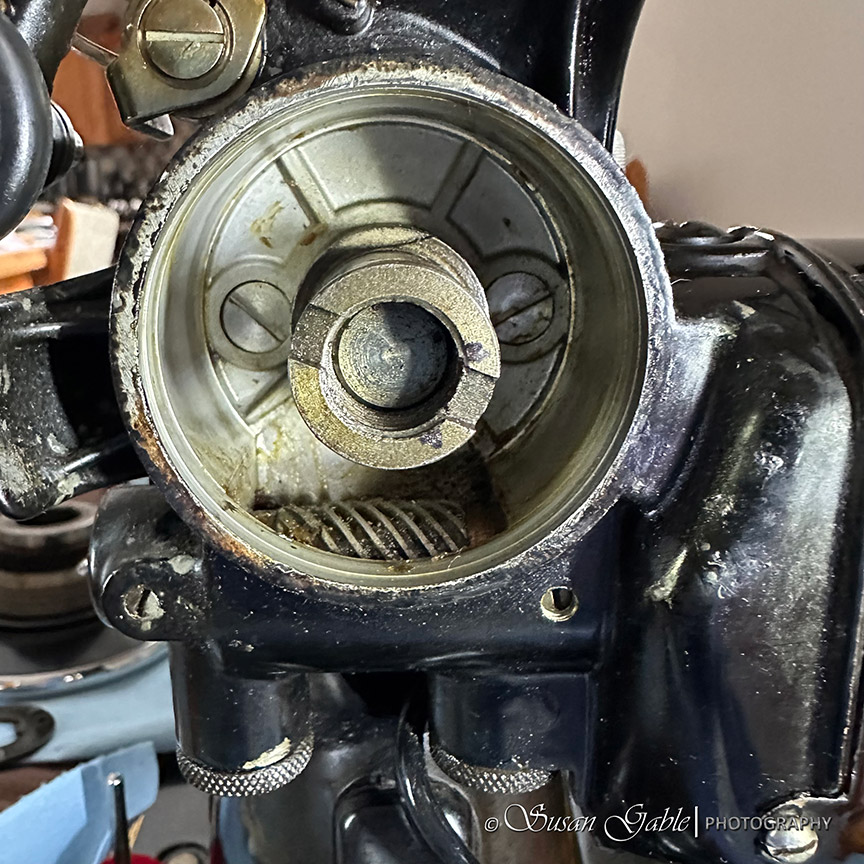
I found the bottom gears and components were surprisingly clean. Maybe too clean as there was hardly had any old grease to clean up. I did notice the moving parts including the bushing and shafts looked rather dry.
Another thing I noticed was the lack of lint and thread in and around the machine. I checked in the bobbin area and found no signs of thread. I knew that rogue threads wrapped around the bobbin system would cause the machine to lock up. That wasn’t the case with my somewhat locked machine.
My hubby mentioned that the owner probably had maintenance done on her machine and for whatever reason, the machine sat for years without any use.
I took my designated sewing machine toothbrush and brushed the lower bevel gears out to remove any old grease. I then grabbed my Sew-Retro grease and placed the new grease into the gear’s teeth. I slowly turned the hand wheel to disperse the grease onto the other moving gear. I used the Sew-Retro oil and added oil to the oil holes and areas where I could see any metal parts trying to move.

I replaced the rubber feet and it took me awhile to remove the old rubber pads as they were stuck in place and required a screw driver to dig them out.
Once I was finished with the bottom of my machine, I put back the oil drip pan cover and screwed it down with the thumbnut.
The next item on my list was to replace the old belt. Once I removed it from the hand wheel and the belt pulley drive, I noticed the old belt had a permanent “v” from years of non-use.

I replaced the old belt with a new SUPERBELT that was much softer and produces less strain on the motor.
I continued to oil the topside of my machine through the open oil holes on the body. I removed the top thread spool plate and found a second set of gears (upper bevel) that needed to be cleaned and then applied new grease to the gear’s teeth. I hand turned the wheel slowly to get the grease dispersed and spread to the other gear. I also oiled a few areas where metal moving parts made contact with other metal pieces.
I manually turned the hand wheel several times to get the gears moving. I let my vintage machine sit overnight to soak in the new oil and the new grease before I attempted to turn the hand wheel again.
The next day, I immediately noticed the hand wheel was moving freely as I spun it towards me. I also noticed the thread take up lever and the needle bar was moving smoothly and quickly. No resistance at all. I threaded my machine and plugged my foot pedal into an outlet. I pressed the foot pedal and my machine came to life. I was able to sew a few rows of stitches.

The straight stitches were absolutely beautiful.
From the previous picture, the external areas of my vintage machine still looks dull and dirty with layers of grime. In my next Featherweight blog post, I will uncover what I used to clean up the chrome and make it shiny again. Stay tuned!
Supplies used: Toothbrush, dozens of Q-tips, large microfiber cloth that I cut up into smaller manageable sizes, blue shop towels, old hand towel, small trash bag, disposable gloves, and lots of patience.
Oils/Grease: Sew-Retro sewing machine oil used to lubricate the moving parts and in the oil holes of my machine. Sew-Retro grease used on the gears and to fill the grease tubes in the motor.
Other Tools: Flat head screw drivers in various sizes and lengths. Wera is wonderful brand of slotted screw drivers with good torque for those stubborn screws. A bright LED head lamp that tilts up and down to see into the nooks and crannies. A bright LED flash light.


Leave a comment