Believe it or not, I started creating my ink swatches six months after I started down my fountain pen rabbit hole. The few bottles I started with grew into a dozen bottles and well you know the rest.
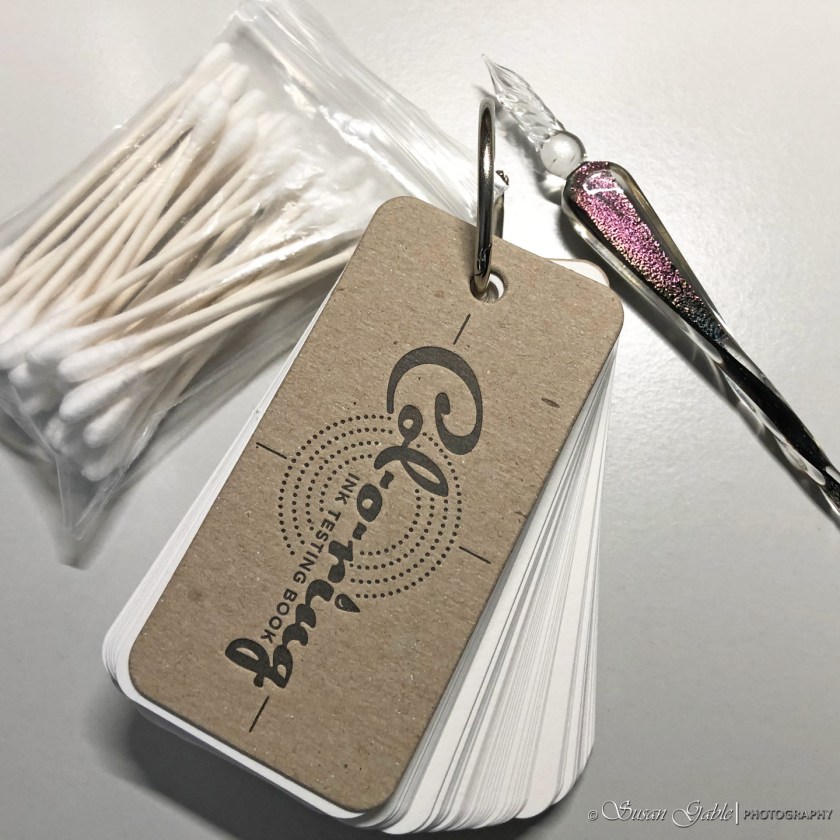
I saw that my fellow fountain pen-folk were using rectangle cards on a ring for their swatches. A quick search produced: Col-o-Ring Ink Testing Book.
Here are the basic tools I use to create my swatch samples. The Col-o-Ring book contains 100 cards.
I will typically set aside a block of time to sit and swatch my colors. Usually, that means I have a handful of sample vials or a few bottles of ink that are waiting in a queue. Remember. I have a small work area and tools (ink towel, shop towels, etc) have to be collected and placed on my desk. Think of a quick setup and quick tear down. Hahaha!
On my desk, I alway have two Oui yogurt jars filled with water. Plus a jam jar for dipping dirty pens. One of the two Oui jars is filled with clean water.
I use a small crystal candle holder to hold my sample vial of ink to keep it from toppling over. I actually found a few at Hobby Lobby when they were having their 50% off candle sale.

Basically, I start by taking my glass dip pen and dipping the nib into the ink. Just enough to cover up to the first swirl of the nib or about 1/2″ from the tip. I will write the ink brand (Diamine, Monteverde, Colorverse, etc) and the name of the ink. I’ve gotten into the habit of doing figure eights and cross hatches followed by quick scribbles with the ink. After I’ve completed the writing, I will wipe off the ink on the nib. A few dips into a jar of water will remove the remaining ink. I wipe the glass nib and get the towel into the groves/swirls to remove the water.
Next, I will take a Q-tip and dip the fuzzy part twice into the ink and then again for the third time. This will allow the ink to saturate the fuzzy part of the Q-tip. Now, I’m ready to swab my card. I swab the card using the side of my Q-tip, going left to right and move the Q-tip further down the card, left to right, until I get to the bottom edge. It’s better to do this swabbing quickly before the ink starts to dry out on the Q-tip.
Once each card is completed, I always place the cap back onto the bottle. One time I was distracted and I almost toppled a bottle of ink over. Yes. I forgot to replace the cap on the bottle when I was finished.

You’ll see some dots on my cards. I drop bits of water while the card is still damp and let it dry. This gives me an idea of what the base or underlying color might be. Also if it’s a sheening ink, what color will show up on the card.
In the following picture, I want to point out several things. You can see the Q-tip I used and how far I dip the tip into the ink. My blue shop towels I use to clean my pens. I find the blue shop towels to be very durable and produces no lint. From the swatch cards you can start see some lighter base colors and rings of dark color around the water drops. The colorful towel underneath used to be a white wash cloth.
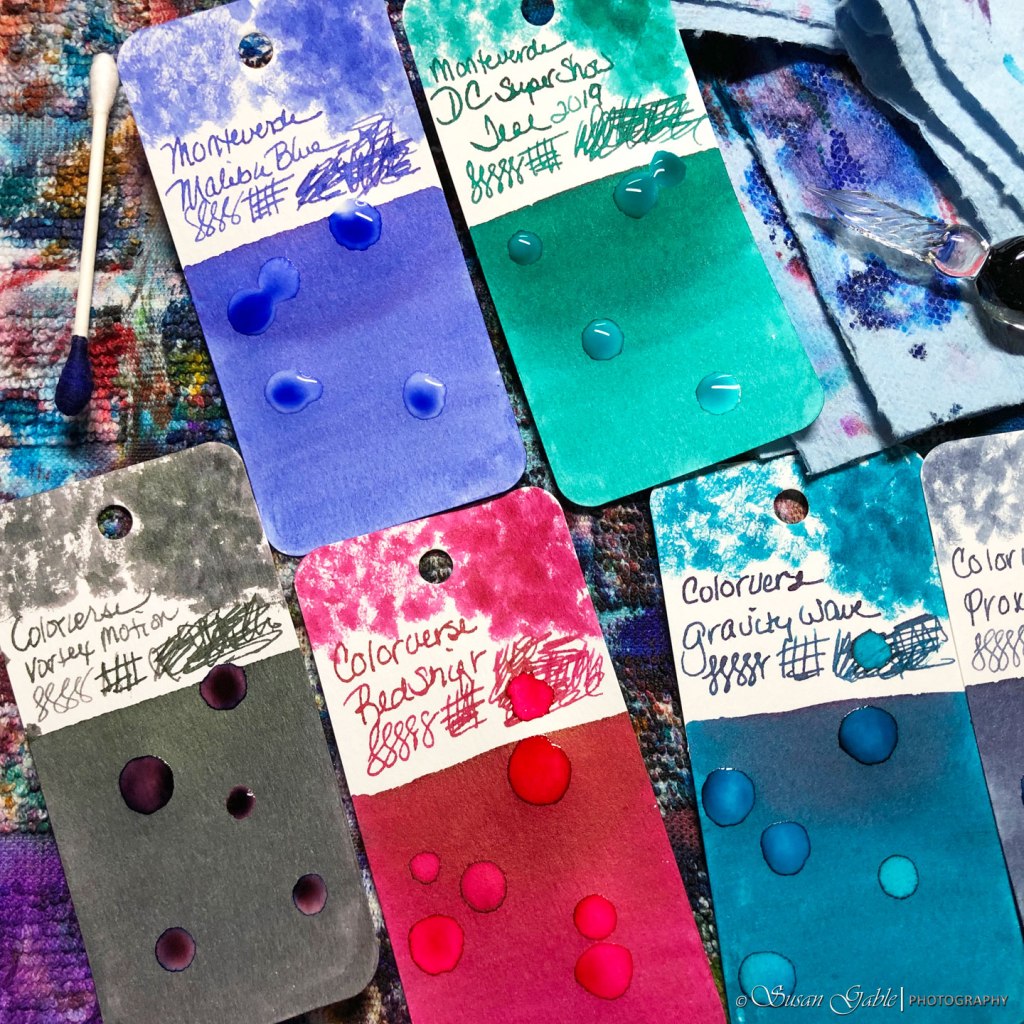
With certain inks, the initial or top part of the swatch will be very saturated with color and take longer to dry. Towards the bottom the color will get slightly lighter.
Here’s a few samples I did recently:


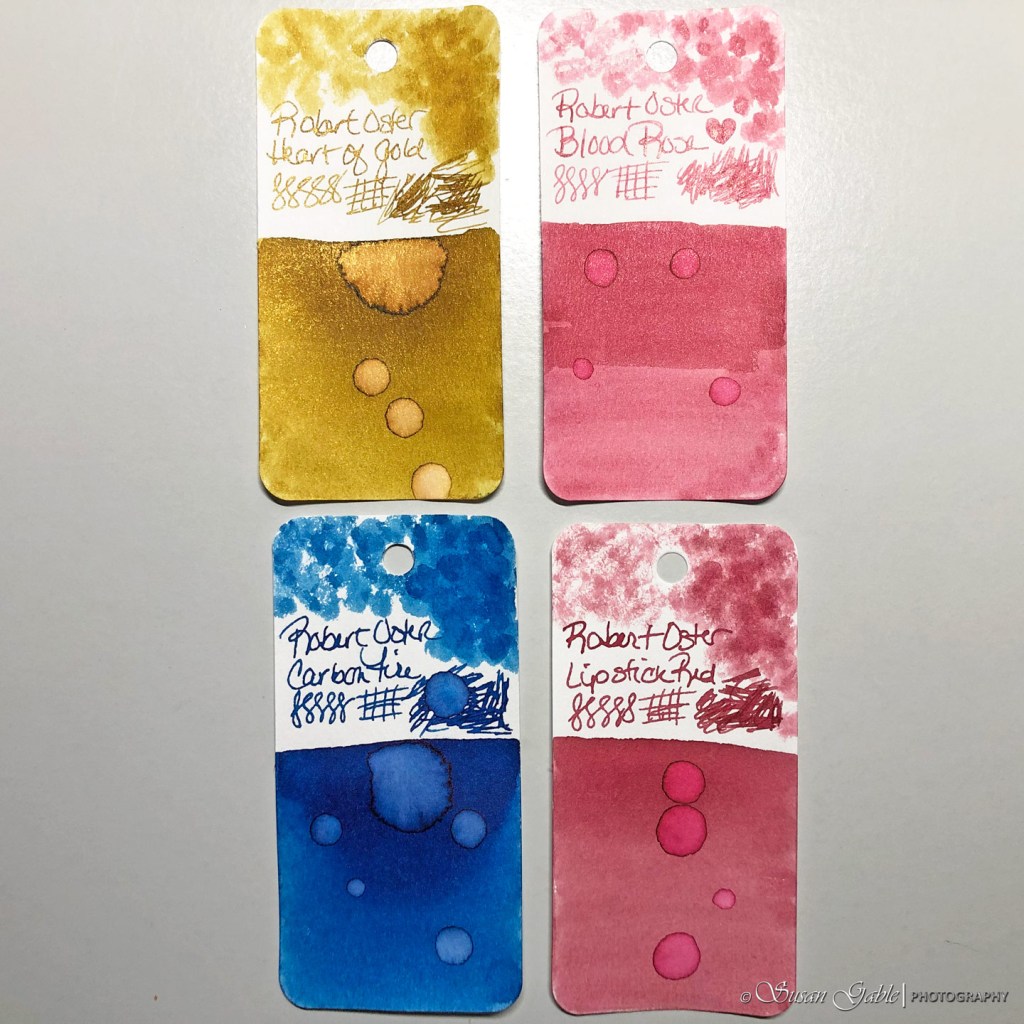

I currently have three Col-0-Rings in use. One is used for sample inks from the sample vials. Another is used for Robert Oster inks (because I have so many). The last one is used for other bottles of ink brands (Diamine, JHerbin, Blackstone, Ferris Wheel Press, Taccia, Sailor, Monteverde, etc). As you can imagine that one is getting full with the included 1-1/2″ binder ring. I may end splitting into a 4th ring. Still deciding.
Tips:
The glass dip pen I use has several swirls above the nib versus straight lines. I found having the swirls allows for more ink to settle into the grooves. I can write longer and dip my pen less often.
A brand new glass dip pen may feel scratchy at first. Take a sheet of paper and practice writing with the new glass pen. Dip the nib into some ink and just write a few quotes, to do lists, favorite musicians, etc. This will help you develop a “feel” for the glass pen and how it writes. Also, the glass tip/nib will smooth out the more you write with it.
For sample vials that have less than 2ml of ink, I have a slender glass dip pen that I can place all the way into the vial. The one that I have shown in the above pictures, the wide grip area is too wide for the vials. At most, I can dip the pen and barely reach the 2ml mark on sample vial.
I use both ends of my Q-tip for swatching. That would mean I get ink on my fingers from the previous ink color. No worries.
Can swap out the binder rings for different size rings. In my case, the binder ring started to get loose from all the color sorting I was doing. Eventually, the ring would not lock tight. I purchased extra rings at my local office supply store. The extra rings, allow me to also create several different books.


Leave a comment