
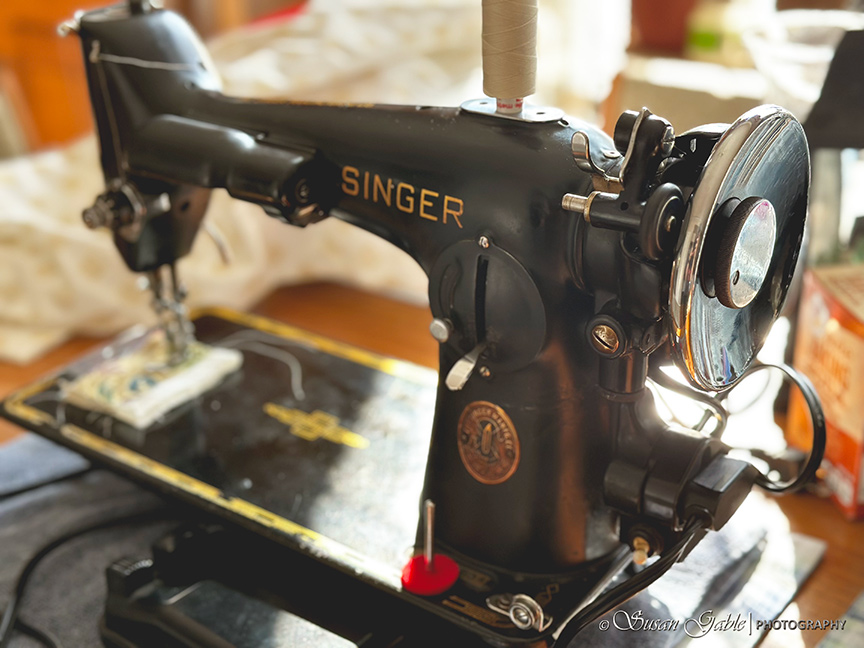
My mind kept going back to the day I picked up my Singer 201. I was given a quick demo on how to use the machine and basic maintenance like oiling the key areas of the machine. One of the demos included how to wind a bobbin. As the bobbin was winding, I noticed the needle bar was going up and down. The shop owner told me he would fix that. So I went around the shop to look at fabric. From a distance I could hear the shop owner using a rubber mallet on the hand wheel. I sensed something was stuck. The shop owner eventually got the needle bar to stop moving while winding the bobbin. All was good and I brought my new vintage sewing machine home with me.
It’s been several weeks later and I was still having an issue with my needle bar going up and down while winding a bobbin. Unfortunately, I forgot to create a video of this issue. Imagine I setup my bobbin to wind from a spool of thread. I disengage the stop motion knob by turning it a quarter turn counter-clockwise. I press the foot pedal to start winding the bobbin. At the same time my bobbin is winding, the needle bar goes up and down like it’s in sewing mode.
I spent some time on social media researching this issue as well as watching videos on what might be the cause of this problem. A consistent problem that came up was the hand wheel was stuck from years of adding lubricant/grease on top of existing lubricant without cleaning the old stuff out. So, decades of lubricant was built up and was collecting behind the wheel.
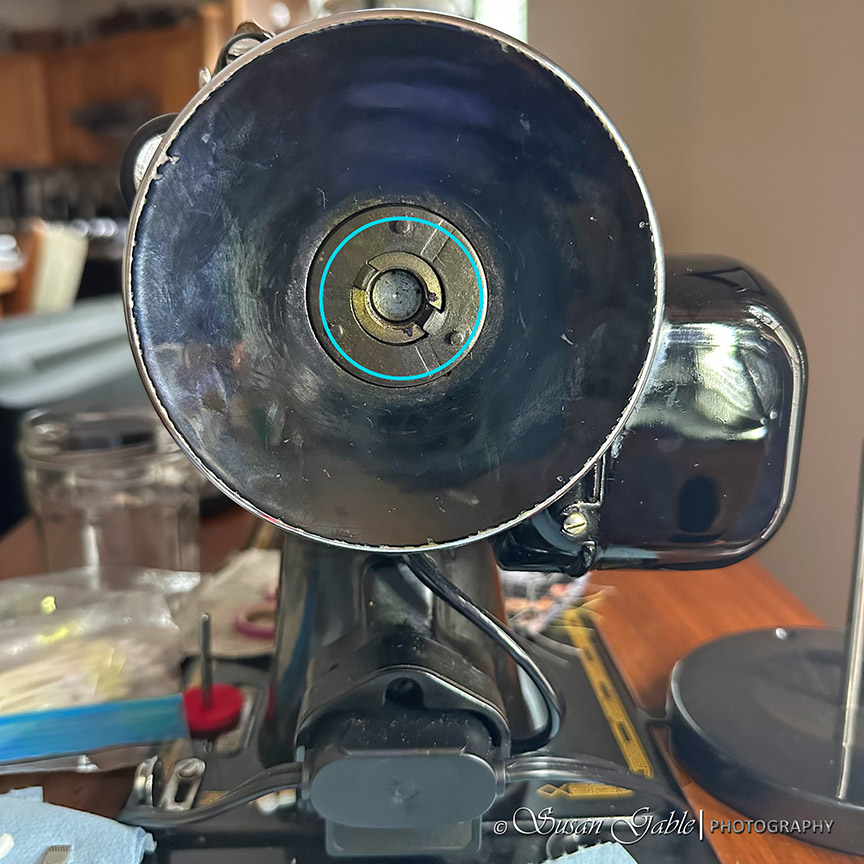
I decided to remove the hand wheel to see what was behind the wheel. The first thing I had to do was loosen the tiny stop screw and then I was able to remove the stop motion knob by unscrewing it. It’s the round metal clamp screw knob that sits in the middle of the hand wheel.
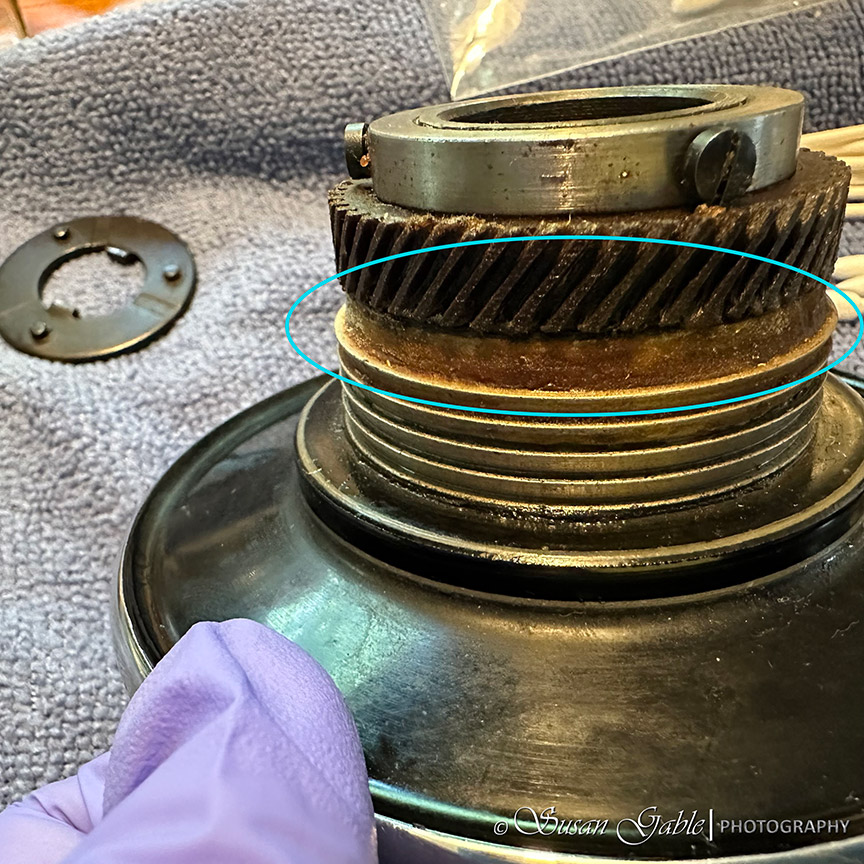
I removed the stop motion knob. In the center of the hand wheel was a metal stop motion washer. I have it circled in the picture. On the washer was three raised nubs. One of the nubs is lined up with its corresponding clip. You can see it on the 4 o’clock position. I took my Sharpie pen and marked dots on the end of the arm/shaft on either side of the clip. This will remind me of the correct position when I put the washer back on the hand wheel.
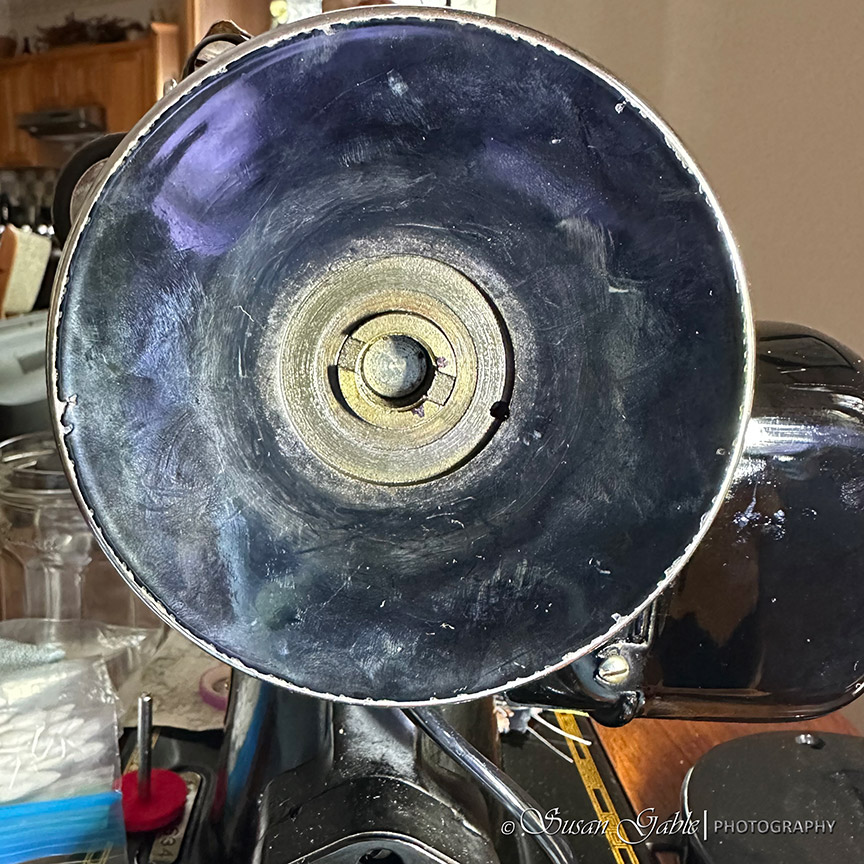
The next picture shows that I removed the stop motion washer. You can see the two marks I placed on the end of the arm/shaft.
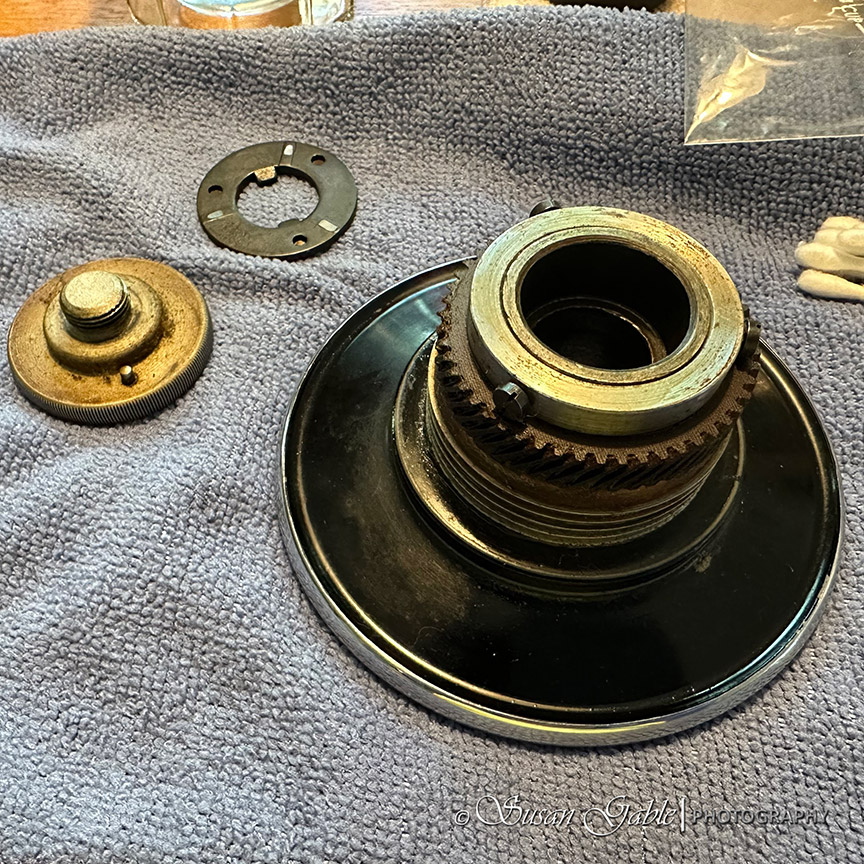
When I tried to move the hand wheel off the shaft, I could feel quite a bit of resistance. So, I ended up moving the wheel back and forth while turning it. I was able to slide off the hand wheel and came across this mess inside.

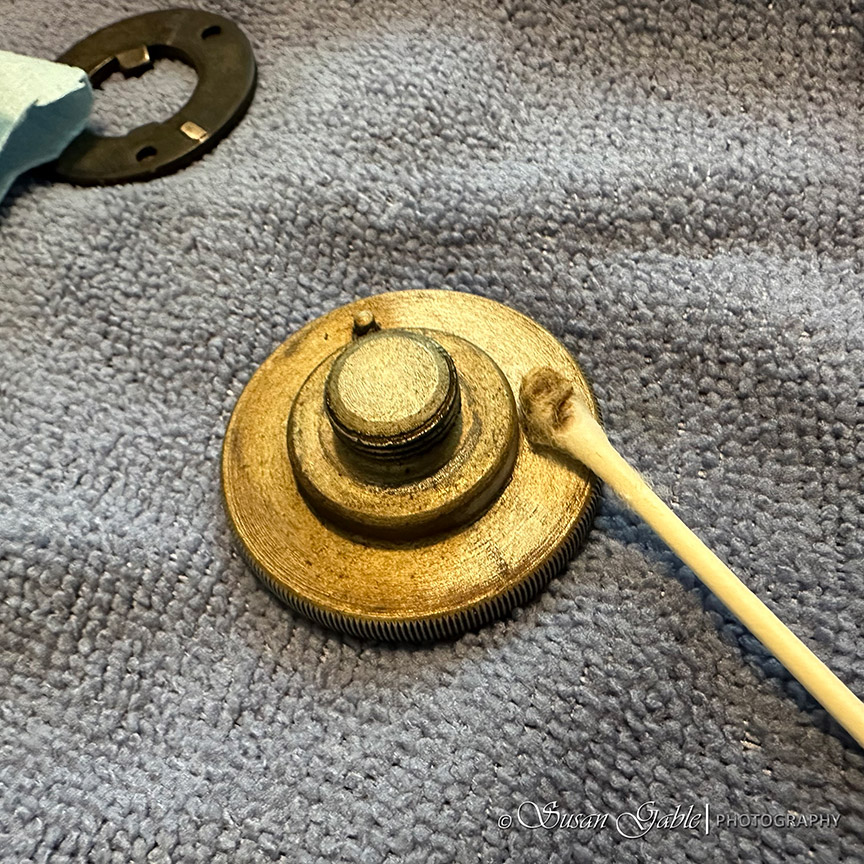
I thought it was a good idea to clean the smaller pieces first like the hand wheel, the stop motion washer, and the stop motion knob.
When it’s time for me to do any maintenance and cleaning on my vintage sewing machines, I always wear gloves. There are instances where I have no idea what I’m dealing with or what’s been used prior to taking possession of my machine. I only cleaned the circle area including under the gear area. I used only cotton swabs to clean the hand wheel. I also removed any gunk I could see from the gear. I was also careful to remove the lint from the cotton swabs that got caught on the gear.
I attempted to the clean the stop motion knob and metal washer. I tried to use the 99.9% rubbing alcohol and decided it wasn’t working/cleaning too well. I used my tried and true Flitz cleaning polish and was able to remove lots of old grime.
Since the hand wheel had the bakelite finish (black paint), I went ahead and cleaned it with the Turtlehead Polishing compound. I removed a few layers of old grime until the polishing cloth changed from dark brown to a light beige color. Then I applied a layer of Zymol cleaner polish for a layer of protection.
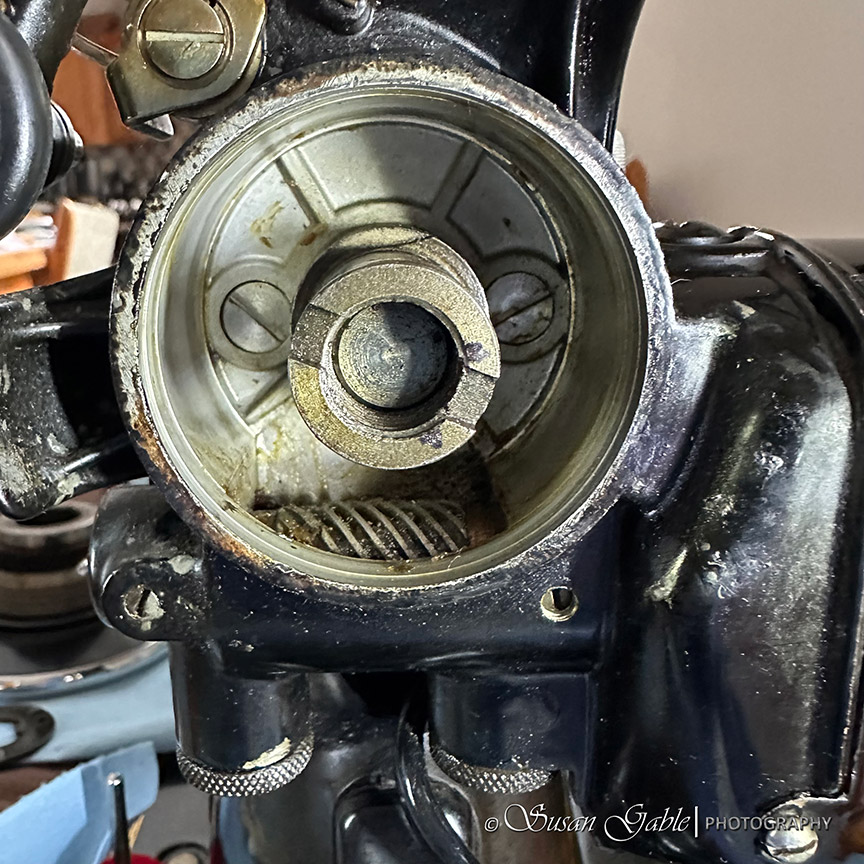
Let’s take a look at the side of the machine again. I went ahead and attempted to clean out the old grease the best I could.
The worm gear was surrounded with the old grease. I ended up using one of my long stick cotton swabs and used the wood end to carefully pick out/scoop up the old grease along the sides and ends of the worm gear. I left some old grease in the gear’s teeth to keep the gear moving.
Under the worm gear, there are two grease cups with metal thumb screws. Those two cups hold the lubricant/grease to lubricate the motor. The user manual mentions that the port has to be cleaned out before adding more grease. Typically, the lubricant should last one year before being replaced. For now, I don’t plan on adding any new grease to the ports.
It would make more sense for me to take the motor, the armature, the worm gear apart and remove the old grease and anything else I might find before adding new grease. That will wait for another day when I have a block of time and energy to devote.
I removed the old grease around the main rod/shaft. I added a small drop of oil to the metal rod so the hand wheel could move easily on the rod. I also added a small drop of oil to the center of the hand wheel so the metal stop motion washer could spin around.
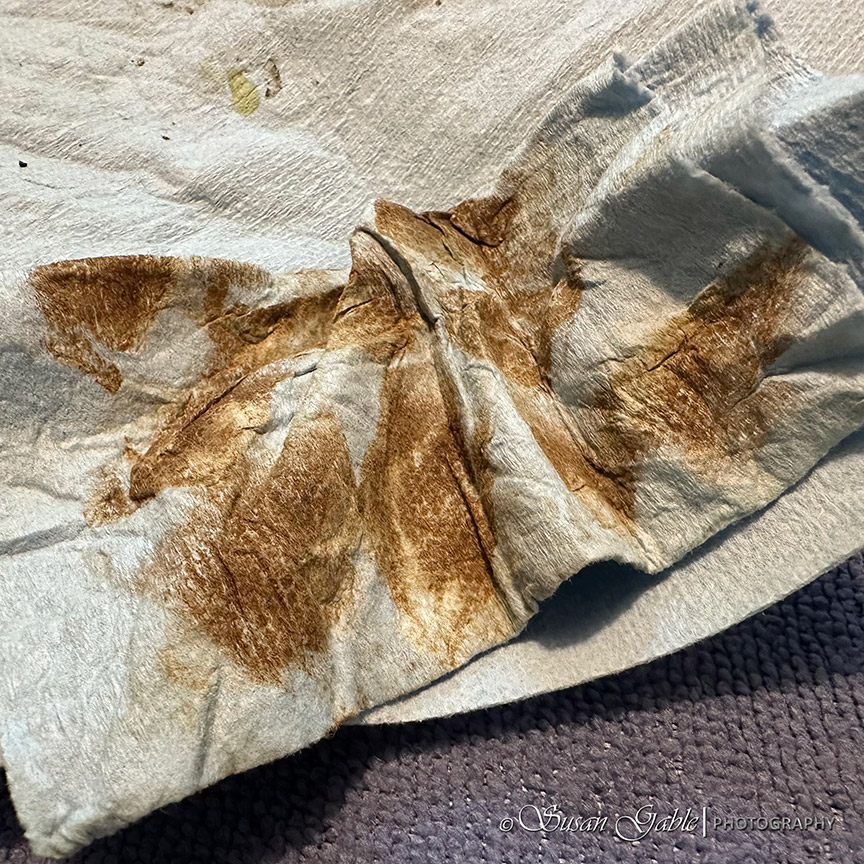
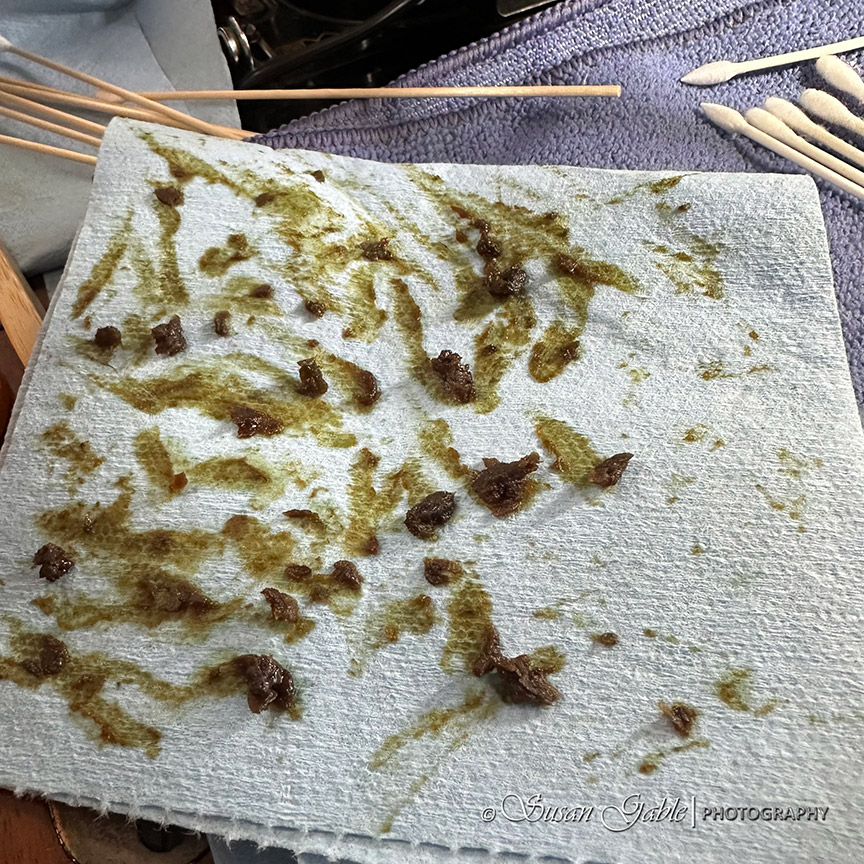
This was one of two paper shop towels I used to collect the old gunk.
As I mentioned, I’m not ready to take my machine apart and for now just giving areas I easily have access to a good cleaning.
With everything put back on my machine and secured, I turned the hand wheel by hand several times. I also unscrewed the stop motion knob a few times to get the cleaned parts moving again and without all the decades of old grease attached.
After a few minutes. I was able to wind a bobbin without the needle bar going up and down. Yes, I’m extremely happy that I was able to fix this last issue.
Summary
I did not know at the time that the hand wheel was stuck on the machine even though it was sewing smoothly and the wheel was turning like it should. Remember I mentioned the shop owner using a small rubber mallet to loosen the wheel? That was the first clue that there was old grease that settled in that area for decades. The machine was sewing like it should have been, but the moving pieces behind the hand wheel were stuck together.
I’m happy the shop owner loosened the wheel for me before I took the machine home. That saved me time and lots of muscle power.
Gloves: Disposable gloves from Amazon
Chrome polish/cleaner: Flitz
Paper towels: Blue paper shop towels
Towels: Microfiber towel cut into small and manageable pieces
Cotton swabs: Regular round swabs. Swabs with pointed dual ends. Swabs on a long wooden stick


Leave a comment