Note: This is a long blog post with lots of pictures. Grab a cup-of-something and follow along on my sewing journey.
Whenever my sewing bug hits me, I use my time to explore new-to-me sewing techniques and challenge myself to sew a project to completion. Last year I came across Center Street Quilts and their lovely bags and pouches. I purchased and downloaded a few of their bag patterns with the hopes of getting the nerve to sew them up one day.
For the last few months this particular belt bag project kept moving up and down and up again in my sewing queue. I saw a few gorgeous bags sewn by other sewers and I became highly motivated to sew one for myself. So many enablers out there on social media.
I spent some time reviewing the instructions and I did find a few steps that left me scratching the side of my head. I had a gut feeling about this pattern and had to let go of my uncertainties and just sew it.
The pattern uses three fabrics for the main, lining, and accent pieces. The main fabric I used is a lovely and colorful Tranquility fabric from a recent purchase at my local quilt shop. I shopped my fabric stash to find a beautiful soft green and white fabric for the lining and a darkish blue two tone fabric to be used for the accent pieces.

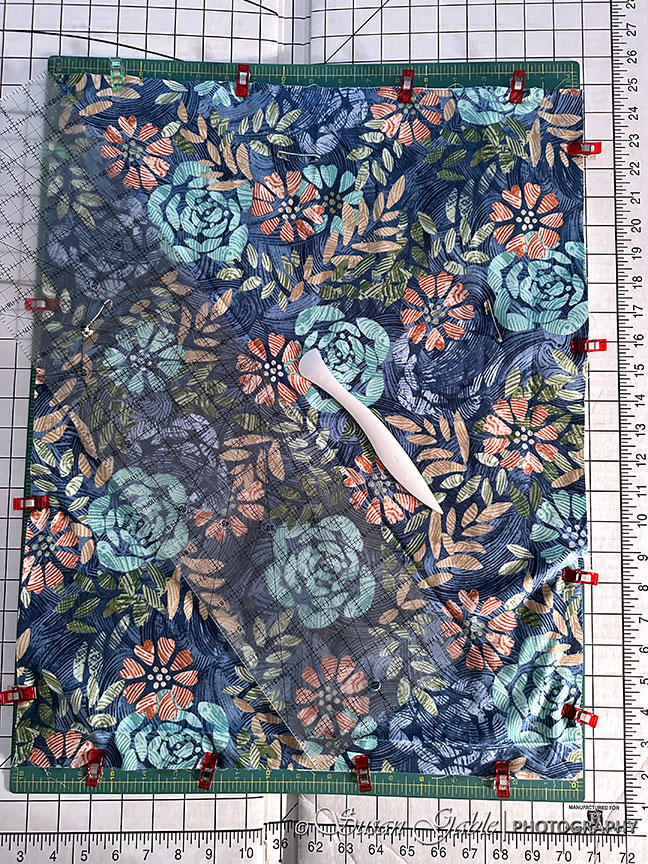
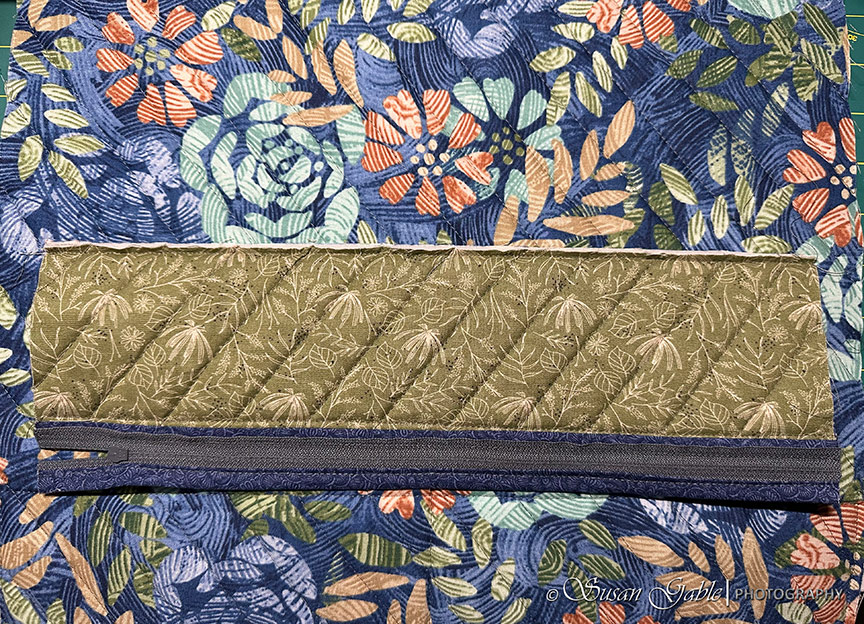
Here is my fabric “sandwich” which includes the main fabric, a layer of soft and stable, and my lining. My fabric sandwich is the largest size I’ve worked on and it barely fits my green cutting mat. Using my Hera marking tool, I scored a single line into my fabric. This will help guide me when I sew my first quilting line.
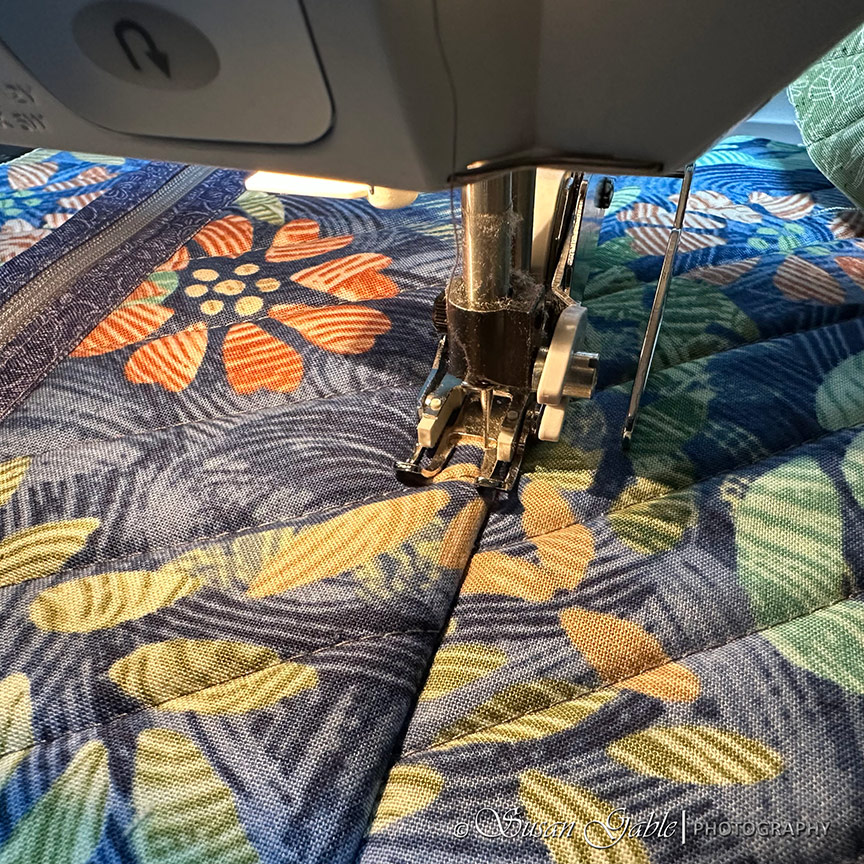
I’m sewing the quilting lines on my fabric sandwich. The throat of my sewing machine is not that wide and so I had to roll up my fabric by hand to fit in the space.
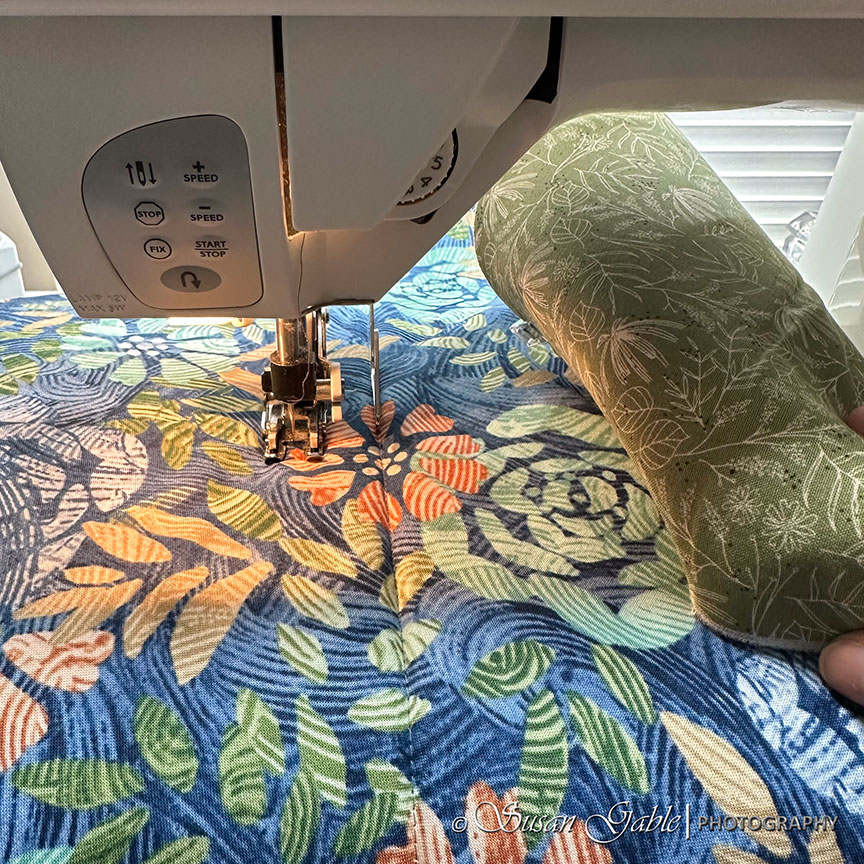
Quilting my way towards the corner. Yes, there’s an ugly crease in my fabric. No worries as it will even itself out and not be as noticeable later.
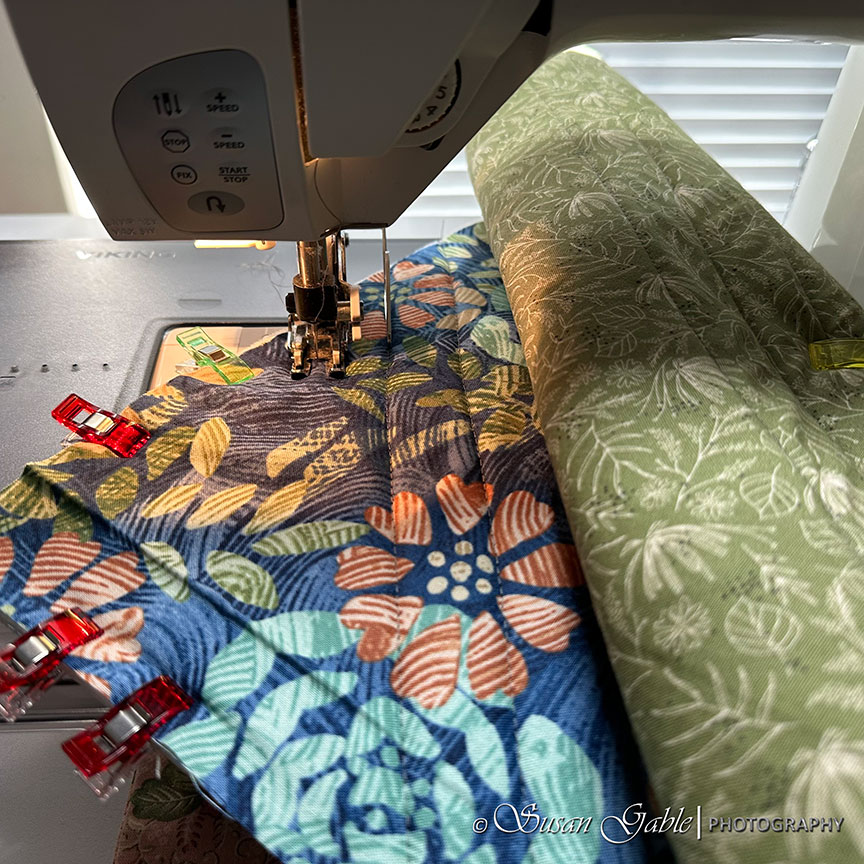
Here’s the limited space I’m working with on my machine.

I used my curved quilting safety pins to hold my sandwich together while quilting. I had strategically placed my pins on the sandwich before I started my quilting process. The curved safety pins prevents my three layers of fabrics from shifting.
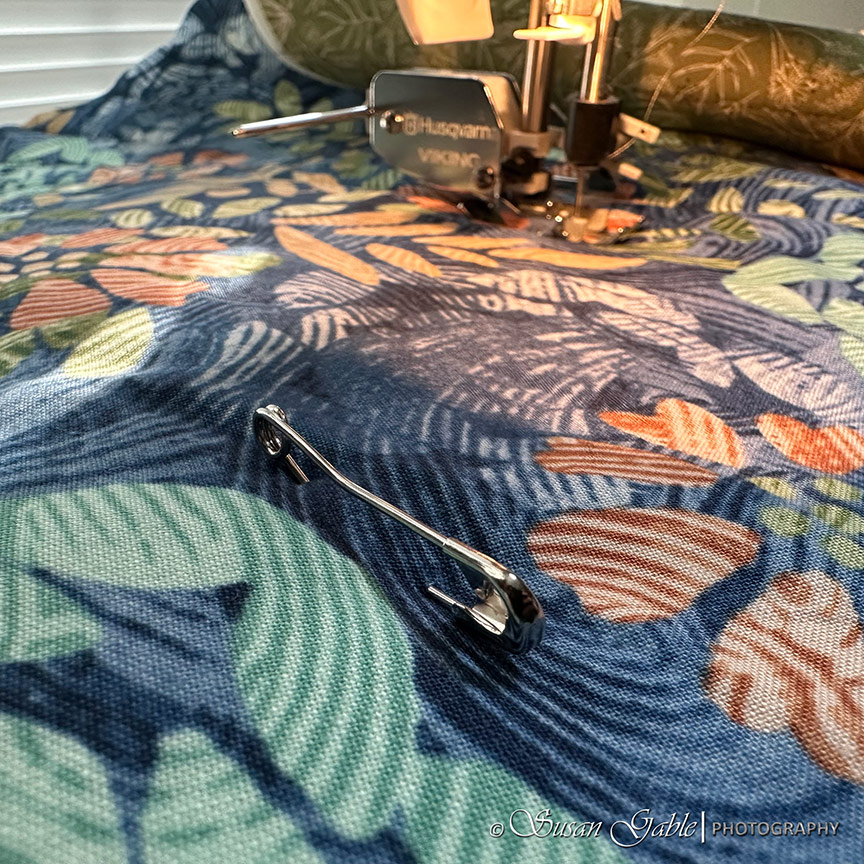
I had a brilliant idea to use a large hot pink sewing clip to hold my sandwich roll on the right side.

Every now and then I had to lift the underside of my fabric to make sure the lining fabric hasn’t gone wonky. So far, so good.

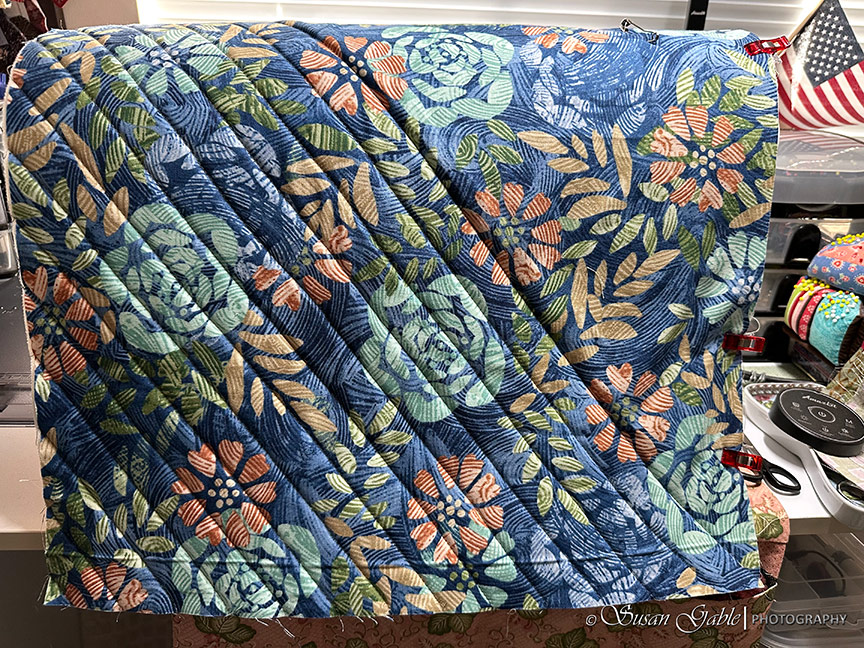
Whew! One diagonal side of quilting completed. I turned my fabric and quilted the other end.
I started to hear my bobbin jumping around a bit while I was sewing. That gave me a clue that I’m almost out of thread. After I finished quilting a line, I stopped to see how much thread was left on my bobbin.

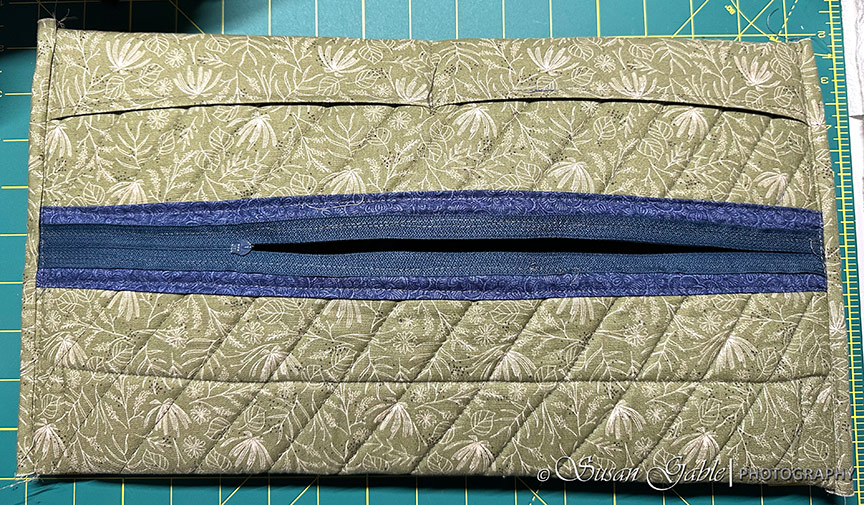
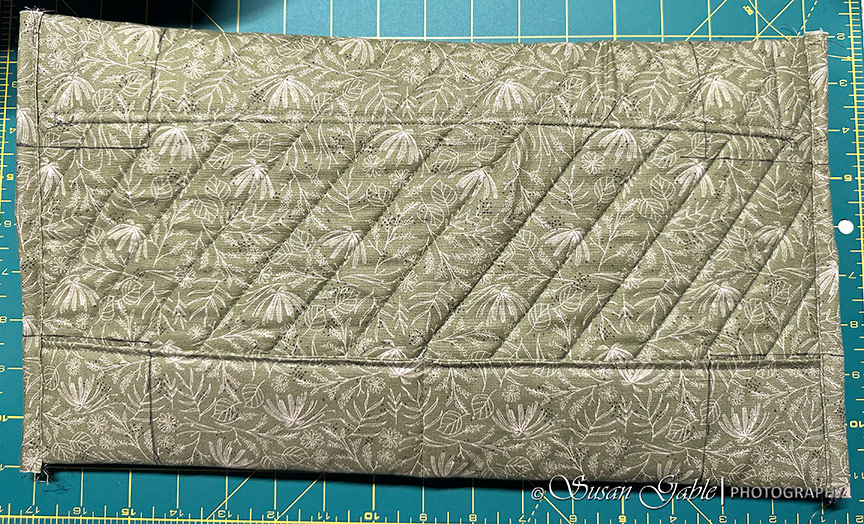
My quilting is completed. I checked the edges of my fabric and it’s not too bad. I straightened and cleaned up the edges by trimming them off with my rotary cutter. Now I’m ready to cut out the outside zipper pocket and the body of the bag.

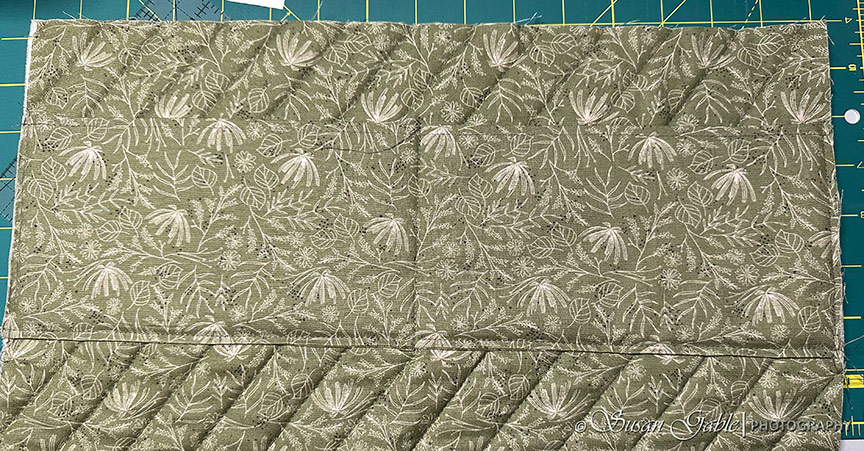
Here’s the resulting pieces cut out: outside pocket (top) and the body of my belt bag (bottom).

Tip #1: I followed the cutting chart and the diagrams. I ended up using my Avery labels to label each fabric pieces I cut (bindings, main, lining, pockets, etc) and attached with my sewing clips. Post-it notes worked wonderfully too. Now, I’m ready to quickly grab what I need and continue sewing.

The following picture shows the lining side of my sandwich. I placed my inside/interior pocket and I stitched across the center of the pocket. Then I stitched along the sides and bottom of the pocket.
Tip #2: I used my walking foot for the majority of the sewing. My walking foot worked well when sewing over the “thick” fabric sandwich for the quilting, sewing the 1/4″ seams (moving my sewing machine needle position), and sewing the bindings. When I had to sew the zippers, I switched to my narrow zipper foot to sew in and around the zippers. Basically, anything related to the zipper areas including the zipper bindings I had to use my zipper foot.
When I use my walking foot, I have to remove the “ankle” from my machine.

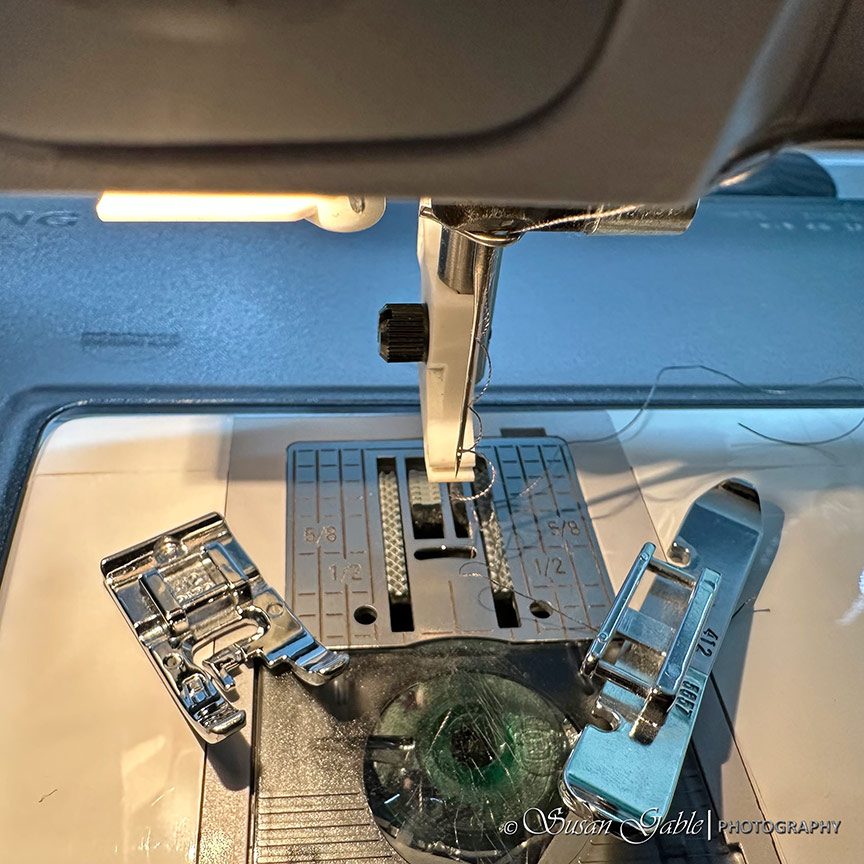
I love using my narrow zipper foot. It looks like a “ski” and with two mounting bars. I can attach my foot with the opening on the left side.

I can turn it around and install it with the opening on the right side. This allows me to sew around the zippers and binding edges and produce clean and even topstitches.

After I’m done installing my zipper, I switch back to using my walking foot.
I sewed my zipper pocket to the body of my bag.
I flipped my zipper pocket up and topstitched over the bottom of the pocket.
I sewed the sides up to hold the zipper pocket in place.

Next, I sewed in the second zipper to the top side of my bag. At this point, I should not have used so many pins to hold the zipper in place. My top stitching came out wonky and had to rip out a few stitches. Next time, I will just hold the zipper in place with sewing clips at the beginning and the end of the zipper and use at most two pins to hold the zipper in place.
Tip #3a: I tried not to tug at the zipper while sewing it into place. I ended up using only 1-2 pins. I let the zipper relax under the binding/fabric and I gently guided the fabric and zipper edges under the sewing foot. My next future project, I will attempt not to use any pins to hold the zipper in place and see what happens. I’ll definitely report my findings.

Tip #3b: Twice I had to undo my sewing stitches because I accidentally sewed off of my sewing path and could not recover. I have a sewing rule: I never have a fight with my sewing machine. This is my sewing machine telling me there’s a problem with the way I pinned the fabric or I needed to move my needle position. I’ve learned to work with my machine and understand the capabilities. This produces less stress for me.
After I installed the main zipper, I went ahead and sewed the ends of my bag together. I then sewed in the binding to cover the raw edges.
I measured and marked the corners of my bag and drew the “squares” to be cut out.
Here’s one of the corners cut out.
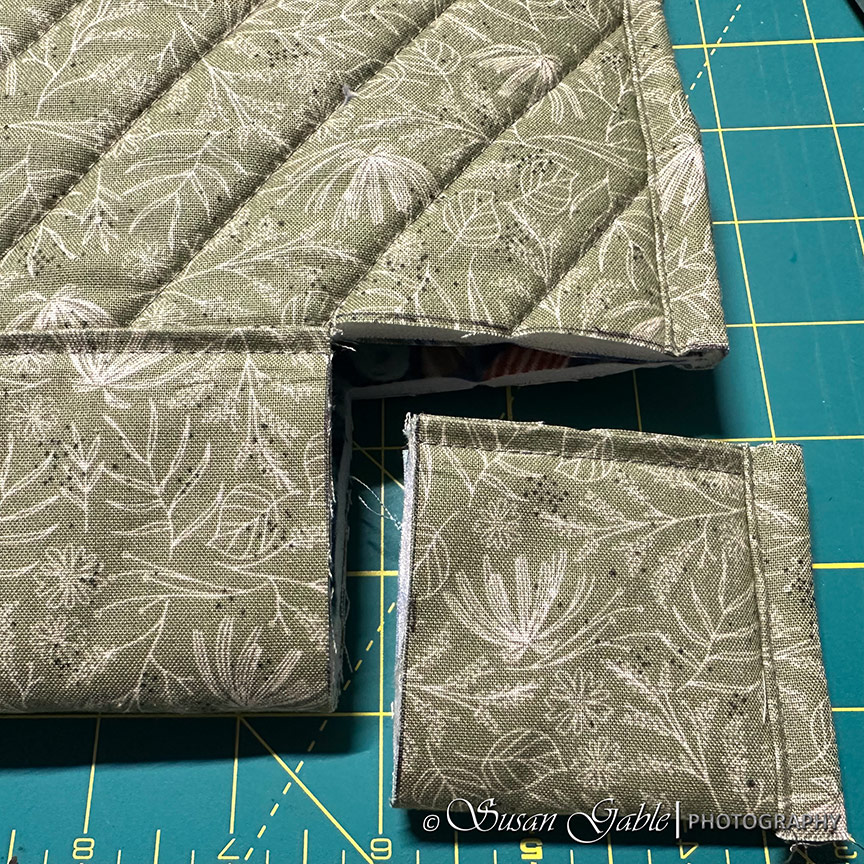
All four corners cut out and now my bag looks a bit weird.

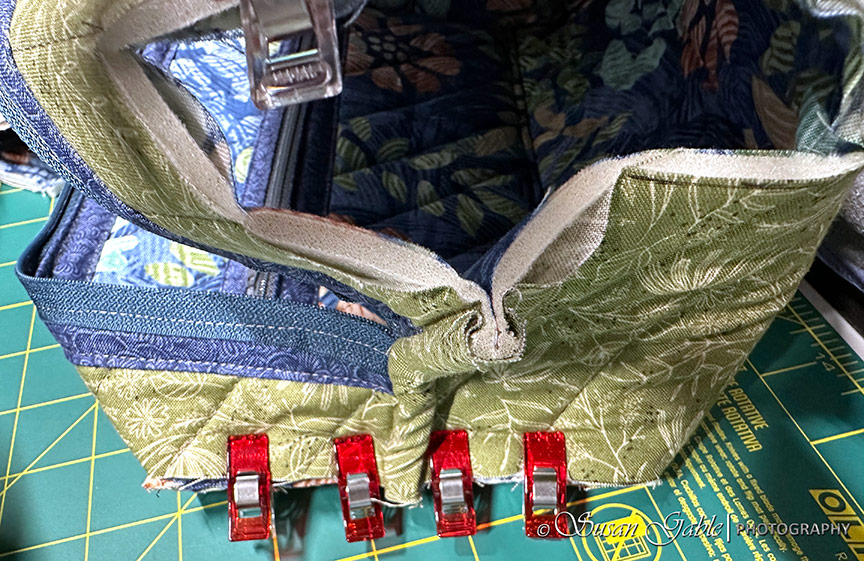
After cutting out the corner pieces, I pinch the corners together (where front zip pocket is located) to create the front edges. The back side of my bag is where my interior pocket is located.
Here’s a better picture to show what one of the front-side looks like.

I did not sew the two back edges as that is where the strap tabs will be inserted. I wasn’t ready to finish the edges as I was waiting for a small package to arrive at my studio.
I moved on to getting my strap tabs ready. I applied a lightweight interfacing to each tab pieces.

I’m very particular about my shoulder straps used with a bag. They need to be soft and wide. I’ve been thinking about changing the pattern a tiny bit. The pattern uses a webbing that is permanently attached to one side of the bag. The other side has a D-ring where the shoulder strap could be hooked. I’m not a big fan of permanently attached straps.
Modification #1: I wanted to add a bit of flexibility to my bag. Instead of sewing a web strap permanently into one side of my belt bag, I decided to add another “strap tab” with a triangle ring. That way both sides would have the same strap tabs with a triangle ring. This allows me to use different straps with my bag as long as my straps have clips on each end.
I had placed an order with Wawak for some sewing essentials which included black matte triangle rings and a roll of 1-1/2″ black webbing. My package arrived at my studio while I was setting up my strap tabs. The timing was perfect. Picture this: a grown woman squeeeeeing with delight!

I matched the strap tabs and sew the sides with 1/4″ seams. I insert the folded webbing with the triangle rings into the strap tabs. It was a bit snug. Next time I’ll do a smidgen-less 1/4″ seam.

After I sewed the webbing into the tabs, I then pulled out the webbing which turns the tabs right side out.
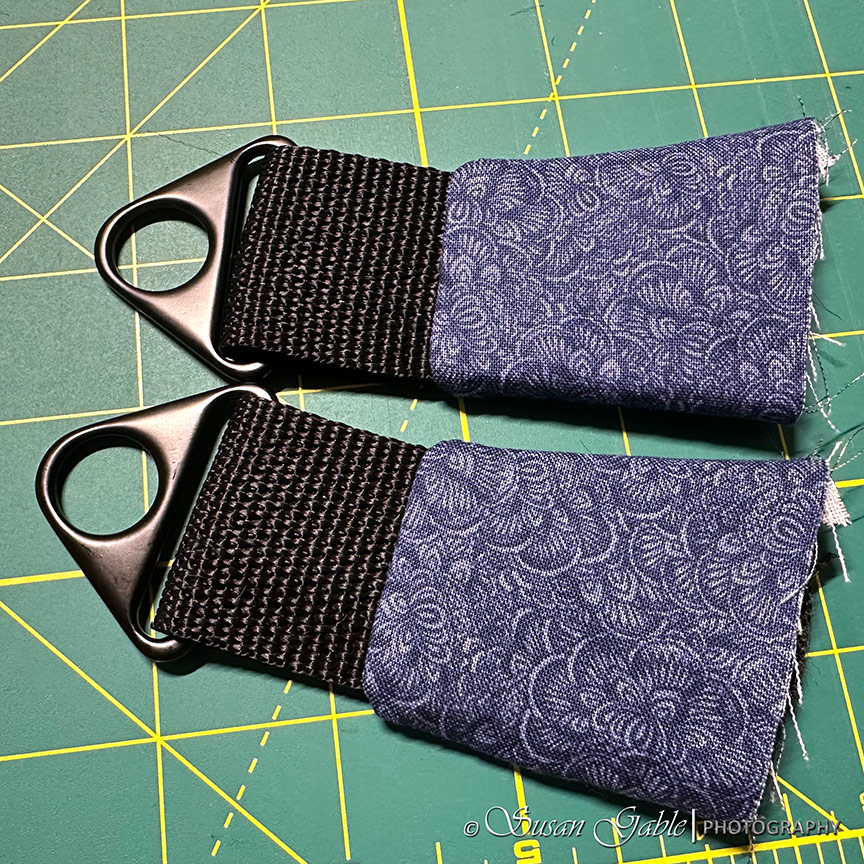
I topstitched my strap tabs. I did sew one of them a bit wonky and had to pull out all the stitches and redo the topstitching. A note to myself to make some adjustments on my next bag. No worries, no stress.

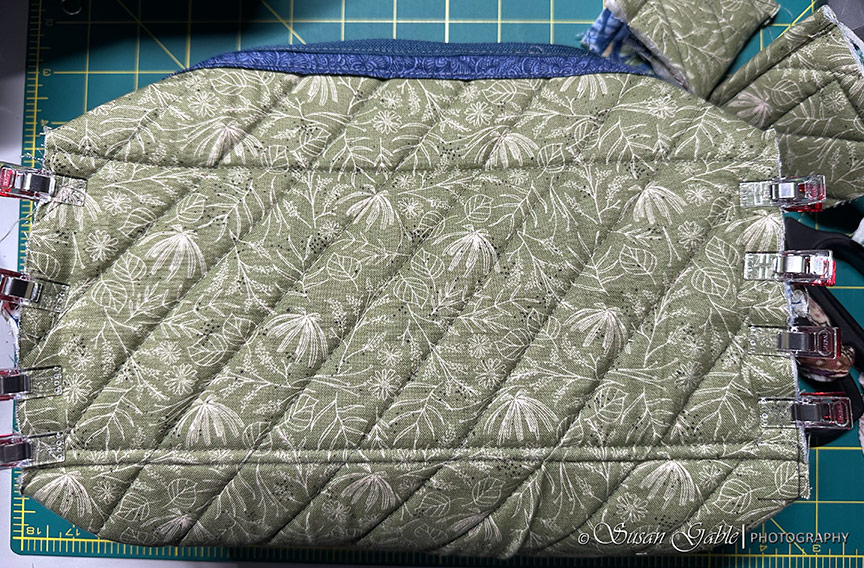
I inserted my strap tabs into the back-side of my bag and sewed the back-side edges close. I finished the bag by sewing the last two bindings over the raw edges. Oooopsie! I forgot to take pictures.
I turned my bag right side out and used a chop stick to push out the corners of bag.
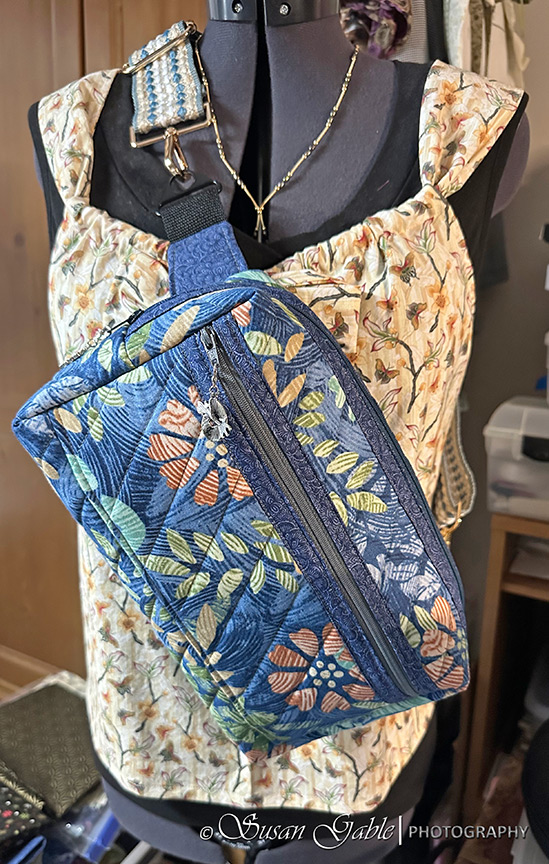
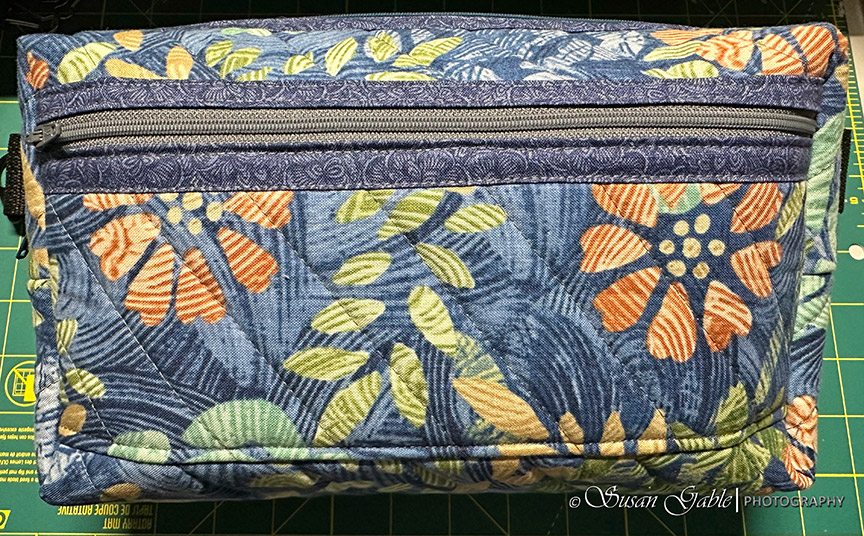
Here’s my completed Everest belt bag.

I do have a few wonky stitches that I left alone which I think adds to the personality of my new bag.
I have a few adjustable straps in my stash. This blue and beige striped strap works well with my new bag.

This belt bag can be worn around the waist, but I prefer to wear it like a cross-body bag. My bag can be worn in the front as shown on my dress form. The bag can also be shifted towards the back with just the strap showing in the front.
I intend on using my bag to carry my art supplies. I can place an A5 journal, my fountain pen case, my watercolor palette, and my water brushes comfortably into the bag.
I plan on making a few more bags. I have a home dec fabric set aside for another version of this bag. I also want to experiment with modifying the pattern and moving the strap tabs to the sides of the bag where the main zipper ends are located.
This was a fun sewing project. The diagrams and instructions were well written. The questionable steps I thought would be an issue were not an issue at all. Once I started putting the bag together and sewed the pieces together, the instructions became clearer as I had something to look at in my hand. Yes, I had a many OMG moments.
Tip #4: Sewing over thick fabric sandwiches with seams. Twice I had my sewing machine thread break while quickly sewing over thick areas of fabric. To alleviate the problem, I used my fingers to press and flatten the fabric. Kind of like giving it a good squeeze between my fingers. I also sewed very slowly over the thick areas of fabric.
Pattern: Everest Belt Bag by Center Street Quilts. Finished size: 10″w x 5-1/2″h x 3″d.
Materials used: Soft and Stable foam stabilizer, Pellon SF101 fusible interfacing (strap tabs), #3 YKK 16″ zipper (external pocket) and 20″ zipper (main body), 1-1/2″ triangle black matte rings, 1-1/2″ black medium weight polypropylene webbing, and cotton fabrics
Sewing feet: Walking foot and slim zipper foot
Tools: Curved quilting safety pins, sewing clips and quilting straight pins. Scissors and Olfa 65mm and 28mm rotary cutters


Leave a comment