
Since I’ve re-started my sewing adventures last year, I’ve been on the lookout for some cool sewing projects. There are lots of free patterns available. I just search the Internet and see what’s available and decide whether the project is quick and easy or will take some time to finish. A few times I will come across a pattern shop that catches my attention and pay for their patterns.
I found some lovely projects and patterns and waited for a sale. Many are downloadable PDF files that contain instructions and pictures. I haven’t had any problems with this format as long as they provide decent diagrams and measurements.
Many of the patterns I’ve paid for provided me with some great sewing ideas for future gifts. As long as I plan ahead and shop from my fabric stash, the projects are enjoyable to sew.
I found a really cool sewing project from Center Street Quilts. It’s a quilted eyeglass case that can be sewn in two different sizes: regular and large. The pattern says it’s fast and easy. I have to agree.
I had a wonderful idea of using something soft for the inside lining fabric. I made a trip to my local Walmart and found large bundles of anti-pill fleece. I was giving each fleece bundle a good squeeze and picked out the softest one in a lovely gray color.
I picked out a few pieces of cotton fabric from my stash and gathered a few bindings that I had already cut and bagged. Since they would be test sewing projects, I wasn’t too concerned about matching fabrics. Well, I tried not to and had to tell my right brain that it was okay not to be so matchy-matchy.
Test #1: Cotton Eyeglass Case
My first test project was to use basic cotton fabrics from my stash for both the main and interior pieces. I also wanted to sew a regular size case and see if my own eyeglasses would fit.
I used a poly batting in between the main and lining fabric to create a fabric sandwich. For the quilting pattern, I sewed diagonal stitches across the fabric sandwich. I have yet to try free-motion quilting on my Viking sewing machine. It’s on my to-do-list of sewing techniques to try. For now it’s basic quilting lines. I trimmed my fabric sandwich down to size about 7″x7″ and followed the instructions to sew the case.


When I sew a new-to-me project, it takes a good hour or more for me to complete the project. I’m literally reading the steps and following along. Sometimes, a sewing step will throw me off. I’ll stop what I’m doing. Take a break. Re-read the instructions and of course have a “light bulb” moment go off in my head.
When I was ready to apply the binding, I was happy to see it’s the same binding process I use.


Test #2: Cotton & Fleece Eyeglass Case
My second test project was to use the soft fleece for the interior or lining of my case. I still used the poly batting as the middle layer and a cotton fabric for the main or exterior of the case.

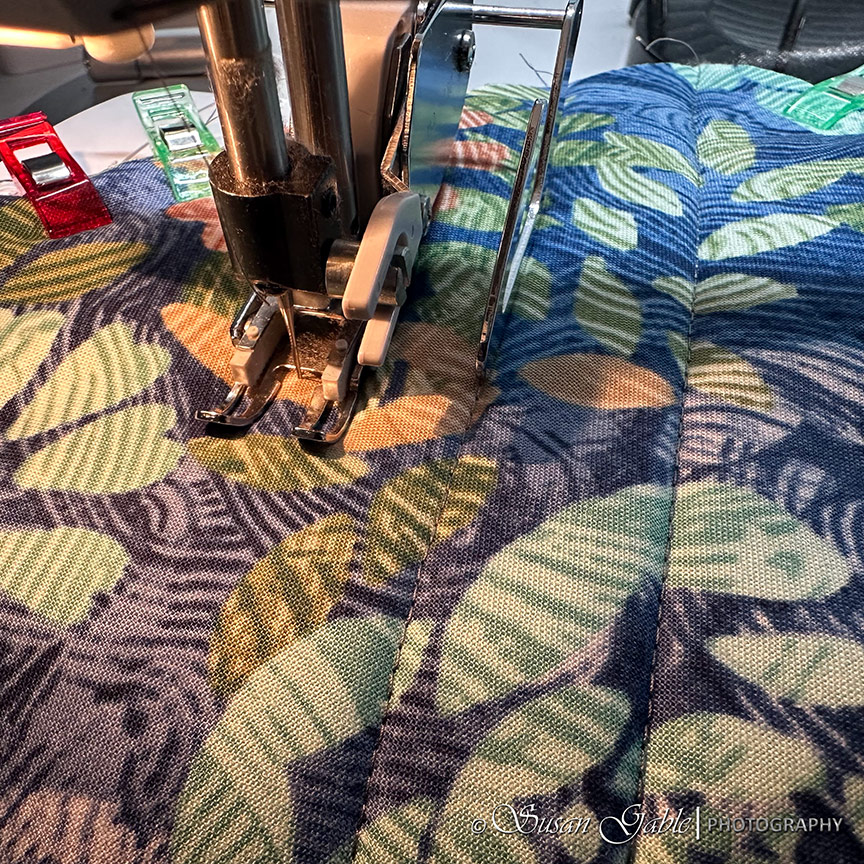
It was a bit difficult to create the fabric sandwich as the fleece wanted to move around against the batting. I started with one corner and matched the ends and tried to match the edges of the fabrics. Once I matched the corners I placed my sewing clips strategically along the edges to hold my fabric sandwich in place.
I sewed diagonal lines across my fabric sandwich. I used my walking foot which helped tremendously to keep my fabric together. I have a tip for sewing the diagonal lines down below.
I trimmed my fabric sandwich down to size about 7″x7″ and followed the instructions.

The fleece fabric I used has a low pile and added a bit of thickness to my eyeglass case.
Sewing My Own Eye Glass Case
Check out this gorgeous cotton fabric I found recently at my local fabric shop. I was initially drawn to the colors and then the floral pattern. The bolt was in sitting in the sale rack. I could see my name all over this fabric. I ended up purchasing the remaining 3.5 yards left on the bolt.


I start by placing the binding on the interior or fleece side of the case. The binding is batik fabric from my fabric stash.

I stitch the binding in place on the topside of the case.

I fold the binding over the top of the case and sew it into place.

My mini clip is a placeholder and lets me know where to start sewing.
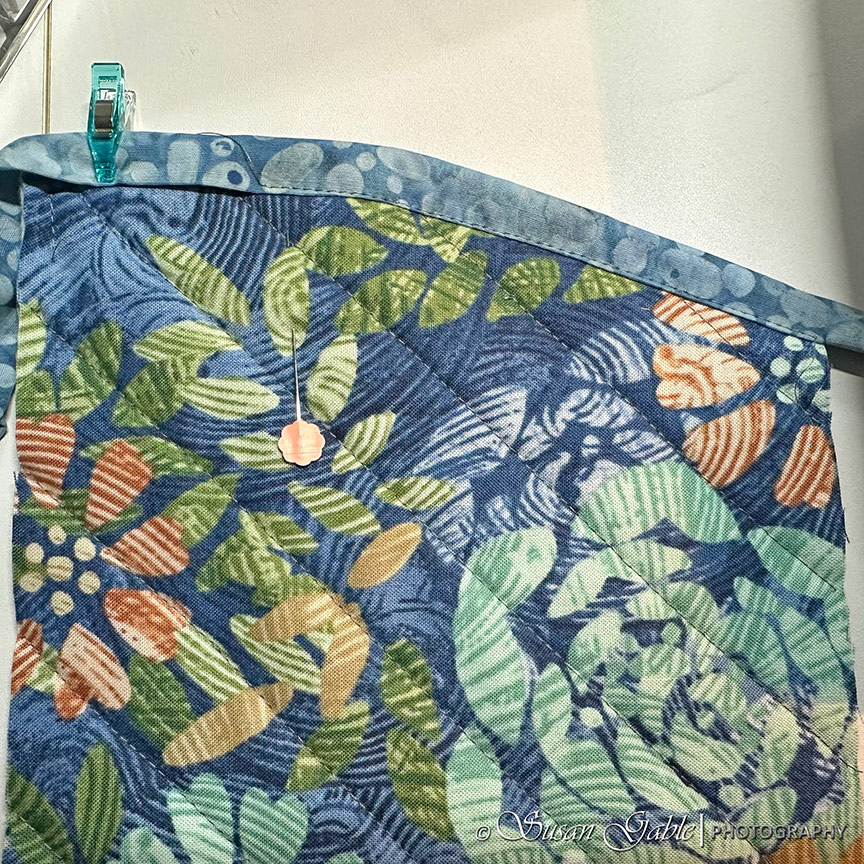
Now, I’m back to adding the binding around the rest of the case.

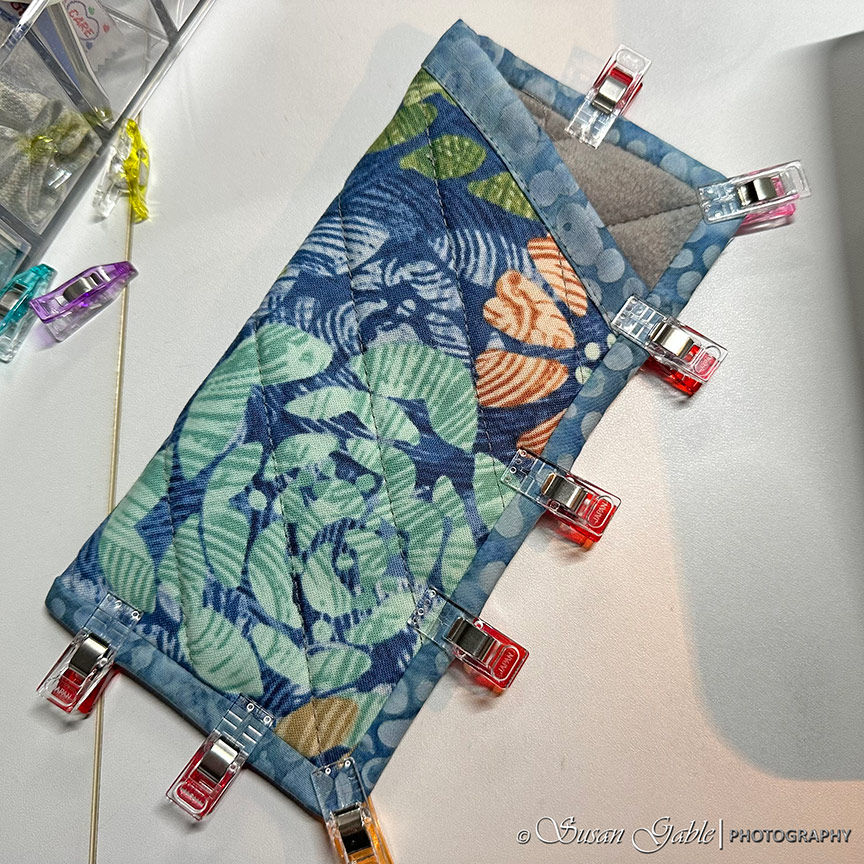
After the binding has been attached, I fold over the binding and use my sewing clips to hold in place.

I turn my case over to double check the clips are placed correctly.
Here’s my finished eyeglass case.

Here’s my eyeglass inside my case. This regular size case is perfect. It’s not too snug or too loose. Just right.

My Thoughts
Overall, this pattern is easy to follow. My first eyeglass case took about an hour to sew. The next case took less than 30 minutes to complete. For me, it was a combination of diagrams and instructions that made it easy for me to follow. I thought the binding installation would take some time, but once I read through the instructions I found it was the same binding technique I’ve been using for my mug mats.

I like how these eyeglass cases sew up quickly.
Tips
Tip #1: I’ve gotten in the habit of printing out my sewing project instructions or PDF files. I always read through the instructions at least twice. If there are any gotchas or concerns, I write them down next to the step(s) or make notes on how I might tackle the concern. A few times, I’ve had to sketch out what I think the instructions are telling me what to do. It’s a good thing I like to draw.
Tip #2: One will notice that I tend to get a few of my sewing supplies from Walmart. They are local to me as in a quick 10 minute drive from my studio. When I need something in a hurry, that’s my first stop. If they don’t have what I’m looking for, I end up on the Internet and checking for in-stock availability. It’s all about planning and using my time wisely.
Tip #3: I think the Large size eyeglass case would be better suited for sunglasses or large frame eyeglasses. I’m thinking large framed aviators. The pattern includes the finished sizes.
Tip #4: My quilting fabric stash contains both cotton quilting and batik fabrics. I have no issues with mixing the fabric to create my end project. I have found that my colorful batik fabrics work well when I’m trying to match the colors in my project. Also I find that batiks are wonderful to use as a binding fabric. This is my personal preference and I’m all about using what I have on hand.
Tip #5: I used my walking foot for all the sewing processes. Very helpful when sewing over thicker fabrics.
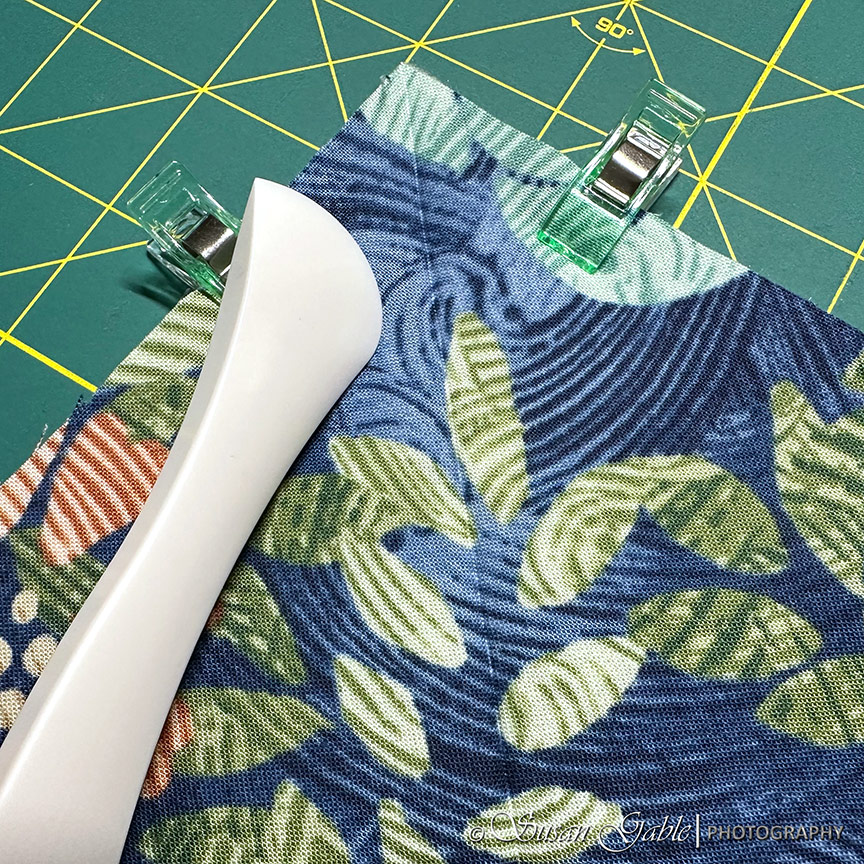
Tip #6: I use my “bone creasing/scoring tool” to score the fabric from one corner diagonally to the other corner. This creates a crease/line in the fabric that I use as a sewing guide to sew my first quilting line.
I use my narrow Omnigrid ruler and place it from one corner of my fabric sandwich down to the other corner.

I use the curve of my scoring tool and slowly drag it across my fabric. I do this about two times…slowly.
The magical line appears in my fabric. I place my fabric sandwich with the start of the scoring line underneath my sewing machine needle. I sew my first quilting line following the scoring line from one corner to the other corner.
On my walking foot, I use the metal arm extension and measure an inch from the needle and moved the arm out. After I sewed the first quilting line (following the score in the fabric), I placed the metal arm extension into the first sewn quilting line. I’m ready to sew the next line an inch away from the first quilting line.

I keep sewing the diagonal lines on my fabric sandwich until I run out of fabric to sew.
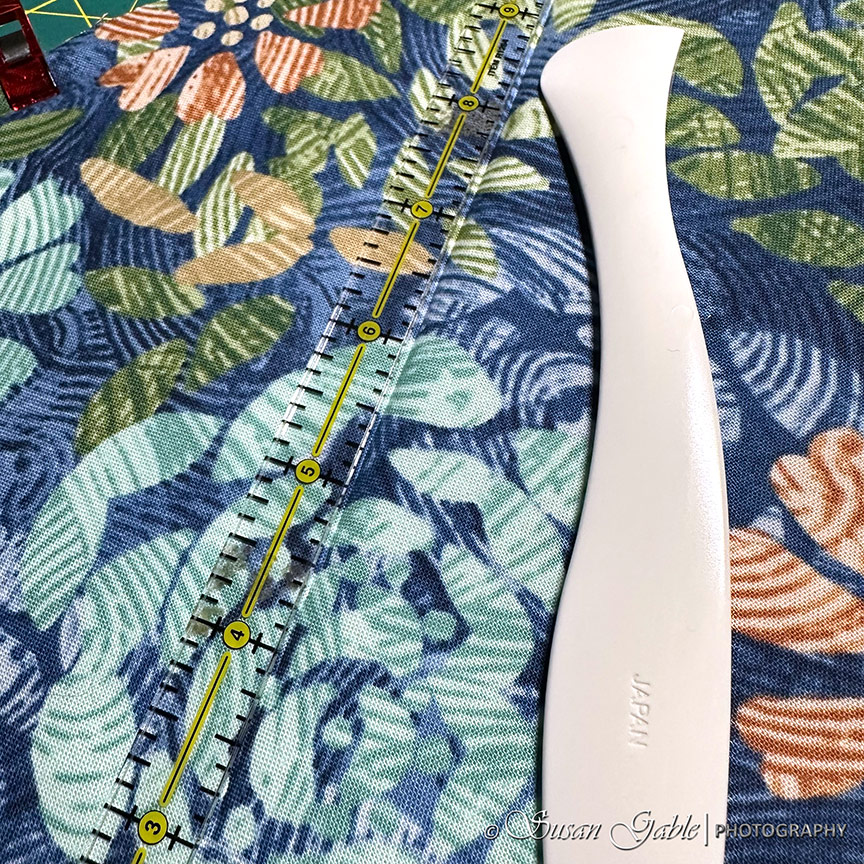
Here’s the flip side of my fabric sandwich and measuring the distance between my quilting lines.
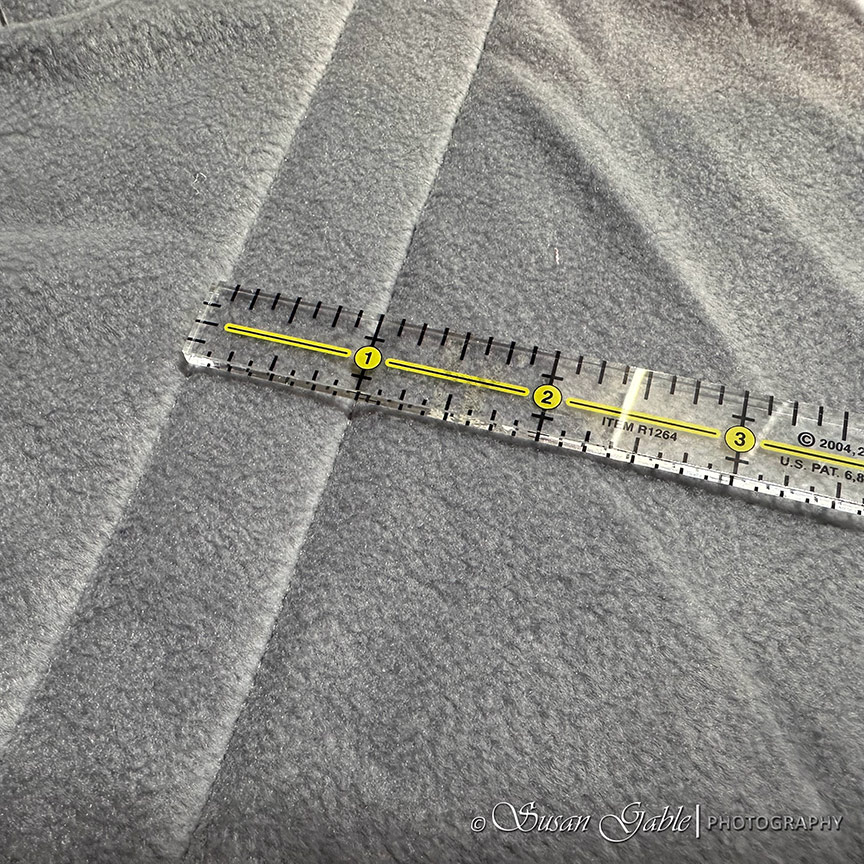
My quilting lines are typically 1″ to 1-1/2″ apart and depends on the size of my quilting projects. For small mug mats I will create 1″ quilting lines.
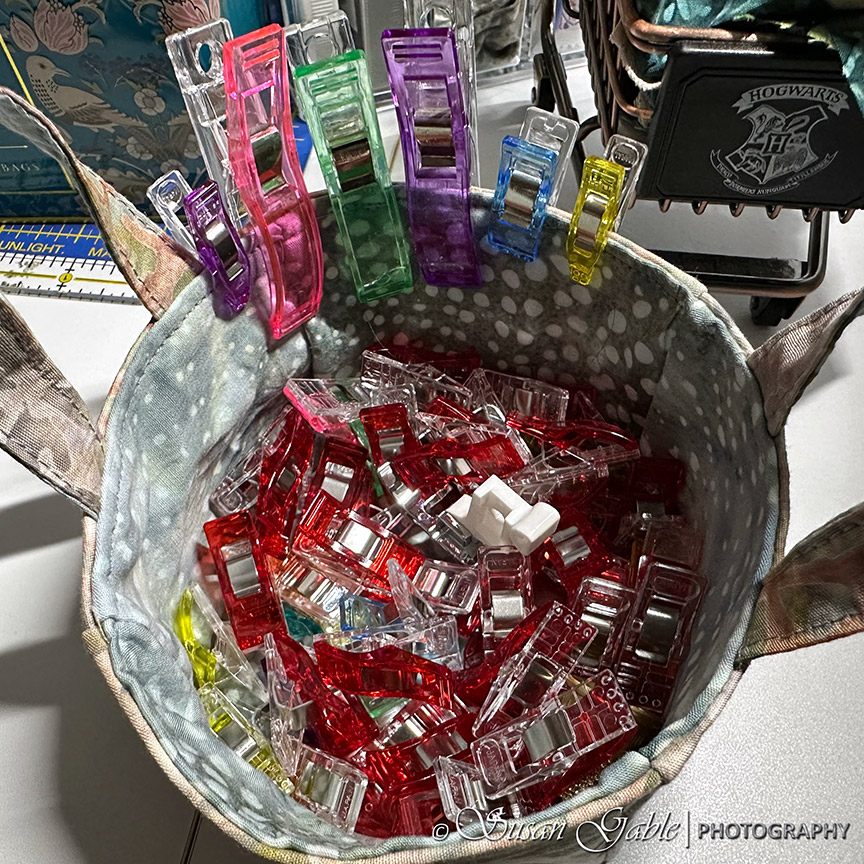
Tip #7: I’ve stopped using straight pins and prefer to use sewing clips. They are easier to use and I don’t poke my fingers anymore. I use three different size clips: mini, standard, and large. The mini-clips are useful for marking an edge or use as a placeholder like stopping 1/4″ before the end of the seam. I use the standard size clips for the majority of my sewing. The large clips are perfect to use when holding two thick quilted edges together or rollup one side of a quilt and clip it in place.
Pattern: Lennon Pouch by Center Street Quilts in sizes: Regular (3-1/2″x7″) and Large (4″x7″)
Fleece fabric: Walmart/Mainstay brand in 54″x60″ bundle in gray
The Polyester batting: Pellon TP970 Thermolan Plus 45″x60″ from Walmart
Bone crease-making tool: Ecohu or Clover brand
Sewing clips: Clover (mini and standard sizes) and Wawak (multi-colored standard and large sizes)
Narrow ruler: Omnigrid 1/2″ x 12″


Leave a comment