Note: this might be a good time to grab a cup of coffee or tea or a bottle of water. 😉
It all started when I was visiting my local quilt and sewing machine shop and I was just looking for some colorful fabrics to go with some fabric I already had in my stash. We all know how that goes, right?
The Search
I had a chat with the shop’s owner and I mentioned I was looking for a Singer 301 sewing machine. Oooops..wait a minute! Let me step back a bit to explain why I’m on this vintage adventure. Late last year I sat in front of a beautiful Singer 15-90 machine at the same shop. I had the opportunity to test drive it. Oh. My. Goodness. The machine came with a table and also a bench/storage seat that contained oodles of vintage sewing accessories and notions. I had a chat with Hubby and he wanted me to make the purchase, but my gut feeling told me to pass on this and let someone else have the chance to enjoy this beauty.
Earlier this year, Hubby sent me a picture of an old industrial sewing machine that he saw. It was a vintage Singer 31-15. It was definitely old, definitely heavy, and would need a lot of work to just clean it up and try to get it to sew. I told him I wasn’t interested in an industrial machine and this was easy pass for me. I enjoyed the surprised effort from Hubby as he is very supportive of my sewing adventures and I knew he would have enjoyed seeing me restore another vintage machine.
So this journey started as I was looking for a machine to handle home dec, canvas, and also denim fabric. To be able to stitch the seams without hesitation.
Right now my current and fave workhorse, my lovely Viking Platinum 770, struggles to sew over heavy fabrics. It’s been a wonderful machine for garment and bag sewing, but there were times when I wanted to sew something with home dec and denim fabrics and I wasn’t too happy with my results. I knew I did not want another computerized sewing machine.
From my off and on research I came up with the idea that a 301 might be a good machine for me and it stuck in my head.
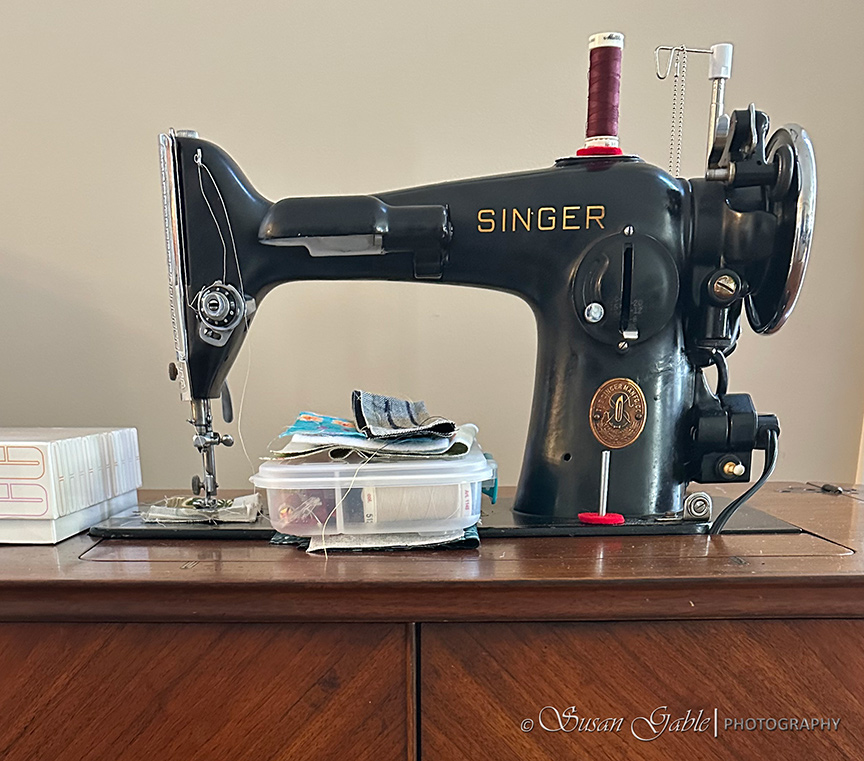
The Singer 201-2
Okay. Back to my vintage adventure. The shop owner mentioned he had two Singer 201s on the floor and I’m pretty sure to distract me from wanting a 301. I walked me over to where he had his sewing machines displayed.
OMG! What a gorgeous machine and cabinet. I had a funny feeling that this machine would follow me home. Not today, but real soon.
The shop owner gave me a quick tour of this lovely vintage machine and showed off the fast sewing speed and the consistent stitches this machine produced. I also noticed how quiet it was while sewing. He mentioned that this machine had a potted motor which means it was a direct drive sewing machine. No belt needed. Results in a quiet sewing experience.
The shop owner was feeding thick fabric through the machine. It did not hesitate at all. This sewing machine had a consistent feed.
Oh and I uncovered the most important piece of information. The 201-2 uses low shank feet. What? Low shank feet. The same ones used on a Featherweight machine. Blink. Blink. Blink. My mind was processing this bit of information. Well, I have a few low shank feet that came with my Featherweight. They will work on both machines. Another OMG moment for me.
The 201 uses the standard metal class 66 bobbins. Okay, I will definitely have to purchase a dozen in the near future. Another type of bobbin for me to keep in my stash, but that’s okay…because it’s a drop-in bobbin machine. Oh my. That will make my sewing life easier. I also saw this machine had a rotary hook with 360 degrees of movement. This rotary systems spins all the way around.
While my head was spinning from all this excitement, I purchased my fabrics and immediately went home. To do further research. On a different Singer machine than the one I was originally was looking for. I had a gut feeling this 201 would be my machine. The left side of my brain needed to complete the research and process all the information. That’s how my mind works. Check all the boxes to make a sound purchase/investment. Trust my gut feeling.
I checked my Singer app and plugged in the machine’s serial number. My machine was commissioned for production on March 28, 1938. Around that time, my machine and the other 9,999 machines (201s) went into production. My vintage Singer 201 just celebrated a birthday and is now 88 years old. My Featherweight machine will also turn 88 this year. More on that later.
Did you notice? I’ve been using the words “my machine” and I hadn’t even purchased it.
I read the reviews. Best straight stitch machine. The Rolls Royce of Singer machines. Top of the line Singer machine. The Dressmaker machine. Beautifully engineered drive trains and hardened gears. Attention to details. Beautiful straight stitching. On and on went the rave reviews I uncovered. There was no going back. I contacted the shop owner and within an hour I was the proud owner of a new-to-me vintage Singer 201-2 sewing machine.
The next day I went to pick up my machine. The shop owner provided me with a few more metal bobbins. He went through and demonstrated the machine and went over the basics. How to wind the bobbins. How to thread the machine. Change/set the stitch length and reverse stitching. Oil the open ports after 10 hours of sewing. Grease the gears every year.
I forgot to mention my vintage Singer is made of cast iron. A heavy duty sewing machine. Good thing I had been doing my daily push ups as I had to carry my lovely 30lb machine from my car and into my home. I ended up leaving the cabinet in my car. There was no way. I could not lift one corner of that cabinet as it sat on shop’s floor. I had to wait for Hubby to come to my rescue. The next day.
The Cabinet
My cabinet weighs around 60lbs. Without the sewing machine installed. It’s heavy. The three woods used during that time period were mahogany, walnut, and oak. My Singer #48 cabinet appears to be made of walnut. I saw the same cabinet on social media and it was mentioned they were typically made of walnut. Isn’t this cabinet a beauty?
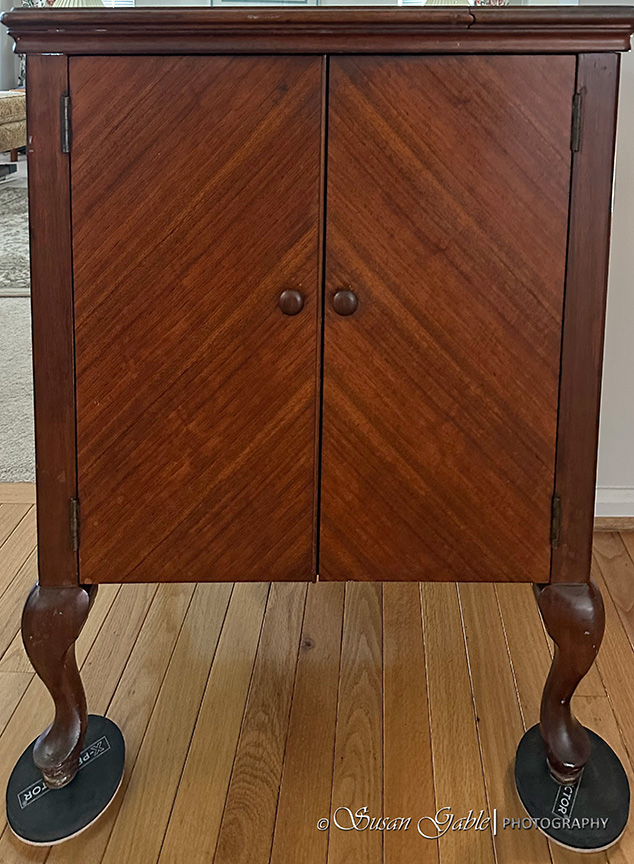
Good thing I had extra round moving pads available and I placed them under the cabinet legs. This would allow me to move the cabinet around on my wood floor until I figured out its permanent location.
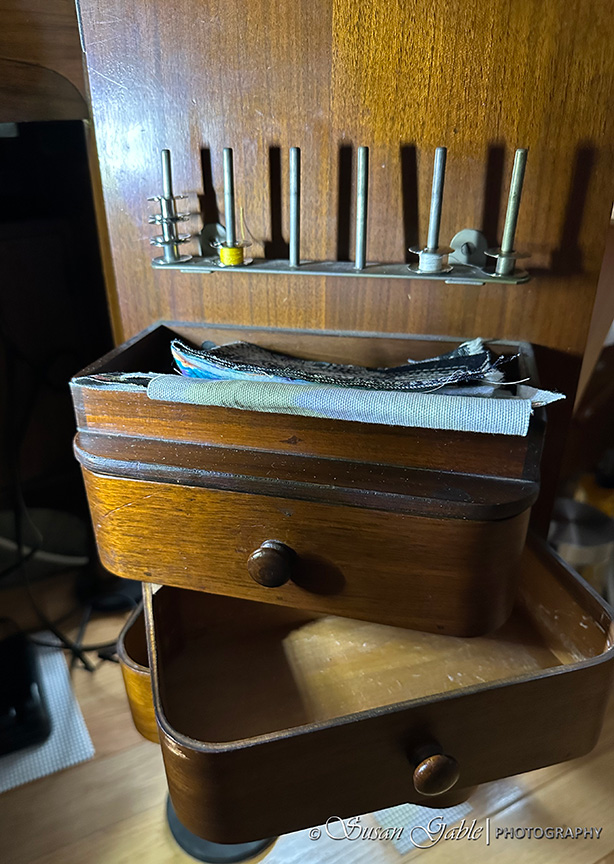
The two front doors on the cabinet opens a full 180 degrees to allow me to sit comfortably in front of my machine without anything getting in the way. On the right side door I have plenty of storage for my notions. The top area has spindles where I can stack my metal bobbins. Under that area is a tray where I can keep my 6″ sewing gauge/ruler, small thread scissors, and scraps of fabric. Under the open area are three drawers/trays that swings out. This would be a great place for me to store some basic colored threads (grey and beige), small screw drivers, cleaning brushes, small tweezers, and sewing clips.
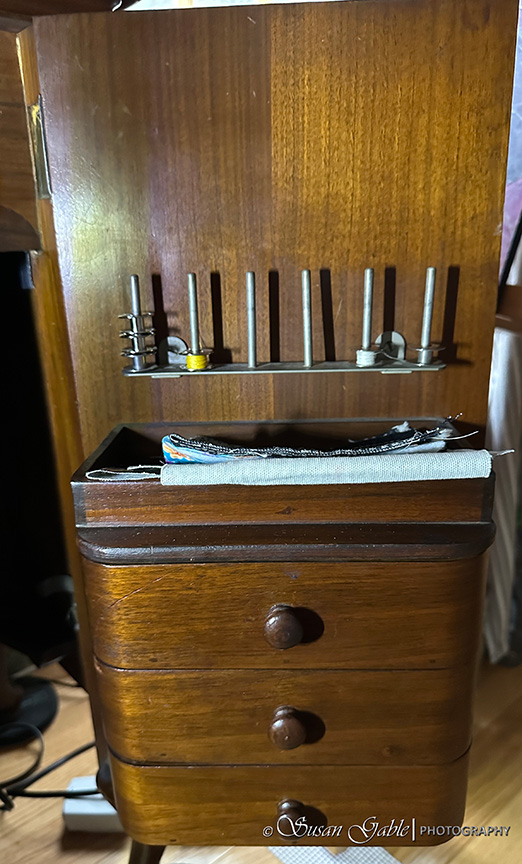
A clever idea to have the trays swing out.
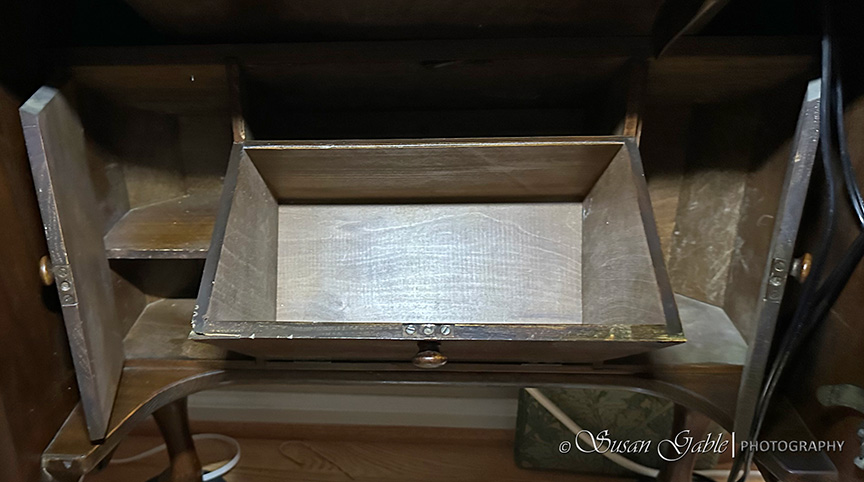
Towards the back interior of the cabinet are three doors. The middle door drops down and on the door itself is a built-in bin. On each side of the middle door are two normal doors that swing out. Behind the left side door there’s a shelf that creates two cubby holes for storage. Behind the right side door is a small storage area. I might use this interior storage area for storing my maintenance tools (oil, grease, larger screw driver, cleaner/polish, cut up t-shirt rags) and other items that I will not use frequently.
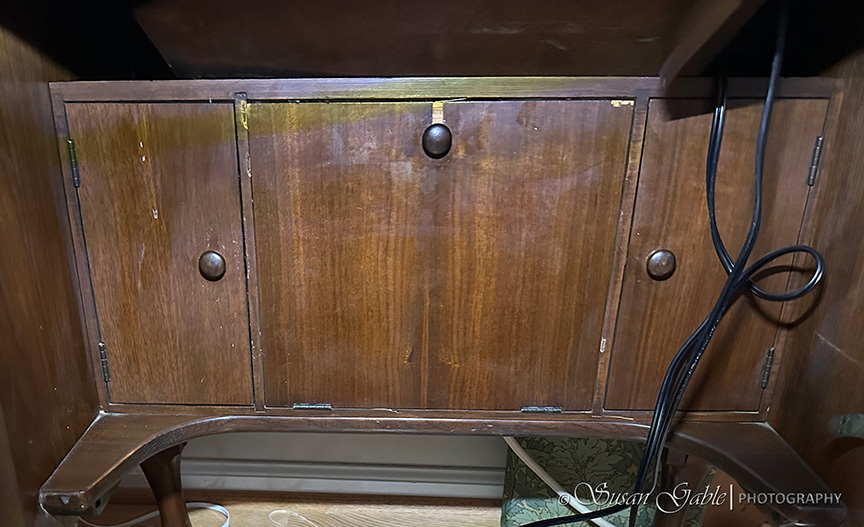
A look behind the three interior doors.
My cabinet still has the metal knee press mounted inside the cabinet, but it’s not attached to the machine or the power cord. The shop owner decided not to include the knee press when he rewired the power cord. That way the sewing machine can be easily removed from the cabinet along with the foot control pedal. This made a lot of sense. This gives me the option to use machine on another table top. I also think this makes it easier to take just the machine (and foot pedal) to the shop for service. If needed.
I am curious to see what the connections/cabling looks like between the knee press and the machine. I might do a quick research to see what’s involved. Again, there goes my left brain.
I also found this #48 cabinet was specifically made for the 201 machine.
The Singer Machine & Cabinet
Did I mention how heavy my machine was? The weight was most noticeable when I lifted it into my arms and tried to mount it onto the lollipop hinges on the cabinet. I tried several times to get my machine in place over the hinges and failed. One side would go right into the machine’s hole and the other side would struggle. I took a quick break to get my energy level back and tried again. I finally got the machine into place by matching the machine’s mounting holes with the lollipop hinge on the cabinet and then I heard the machine slide into place. I screwed in the set screws to hold the machine in place. I have to say the engineers back then were brilliant.
Tip #1: to keep the lollipop hinges upright, I used a rubber band and looped the band around both hinges. This helped to keep them upright at the same time while I tried to mount my machine onto the hinges. In my haste, I forgot to snap a picture of this.
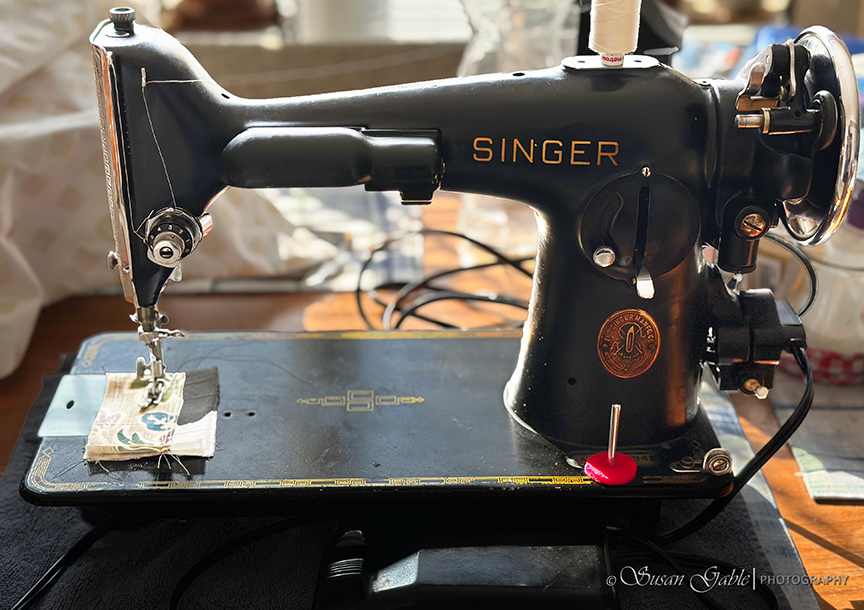
My 201 and #48 cabinet are finally reunited. I know I’m biased. They look really good together.

It looks like I’ll have enough natural light to sew in this space.
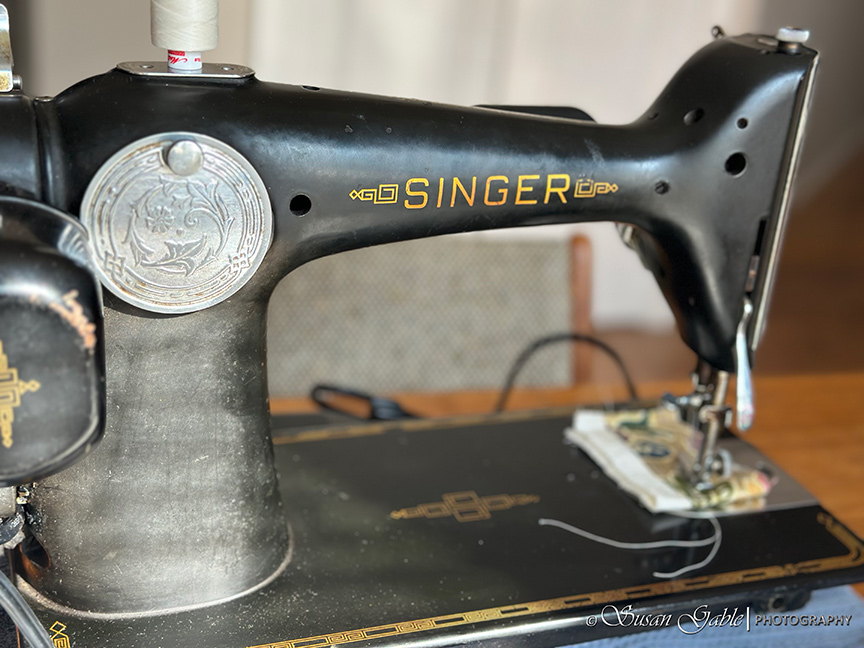
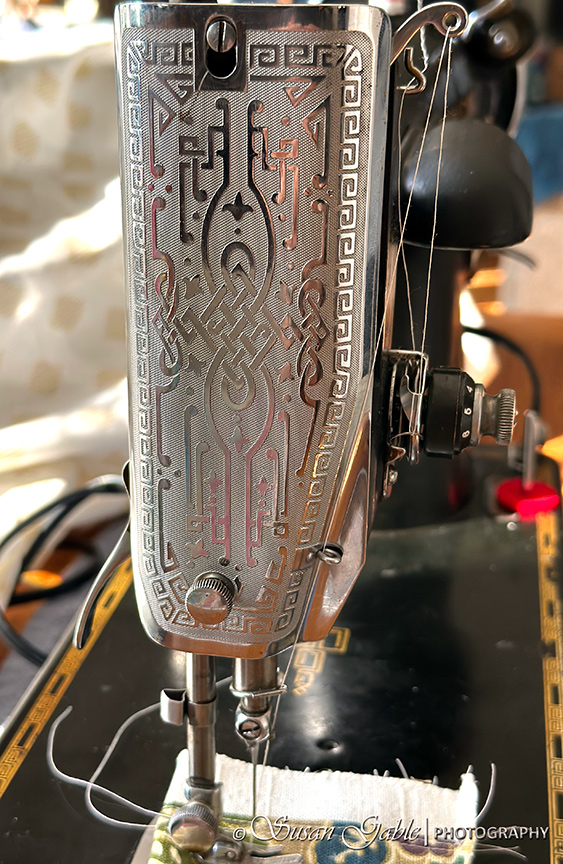
I have to include a picture of the scrollwork on the side face plate.

It’s absolutely gorgeous and stunning at the same time.
The Lighting
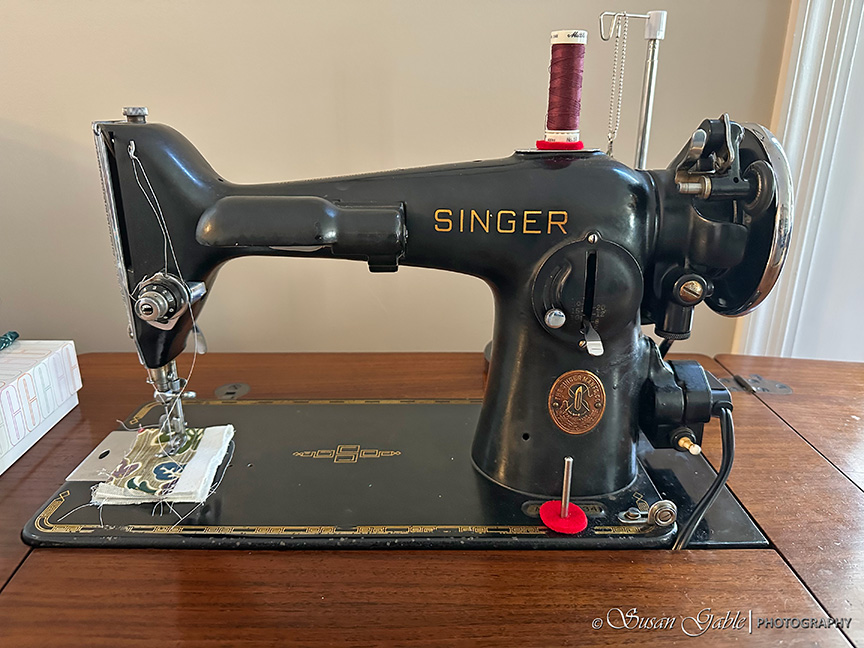
I wanted to see how my machine looked at night and with the lamp turned on. From my picture you can see how powerful and bright the light shines on the main sewing area. For this 201 model, Singer decided to move the lamp towards to the front of the arm for better lighting placement. Notice the Singer logo is towards the back of the arm and not centered like on other Singer models. The lamp does heat up a bit and I plan on changing it out for an LED lamp.
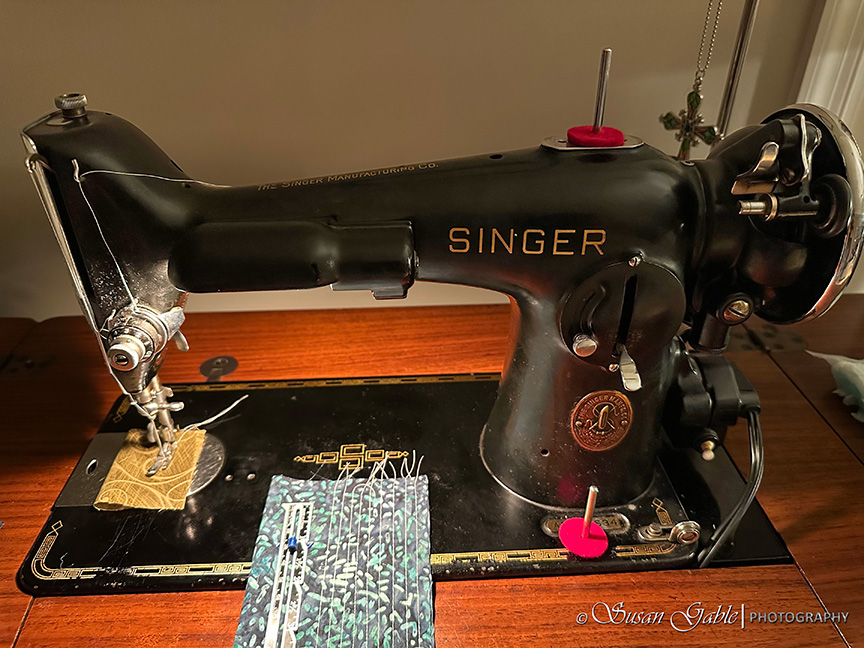
I decided to create a few test stitches and sew out the different stitch lengths. Notice the thread disappeared behind my machine. I’ve had to use a separate thread stand while sewing. Look for Tip #2 below.
The Stitches
I’ve already mentioned my machine sews fast and consistent straight stitches. Check out the beautiful the straight stitches this machine creates.
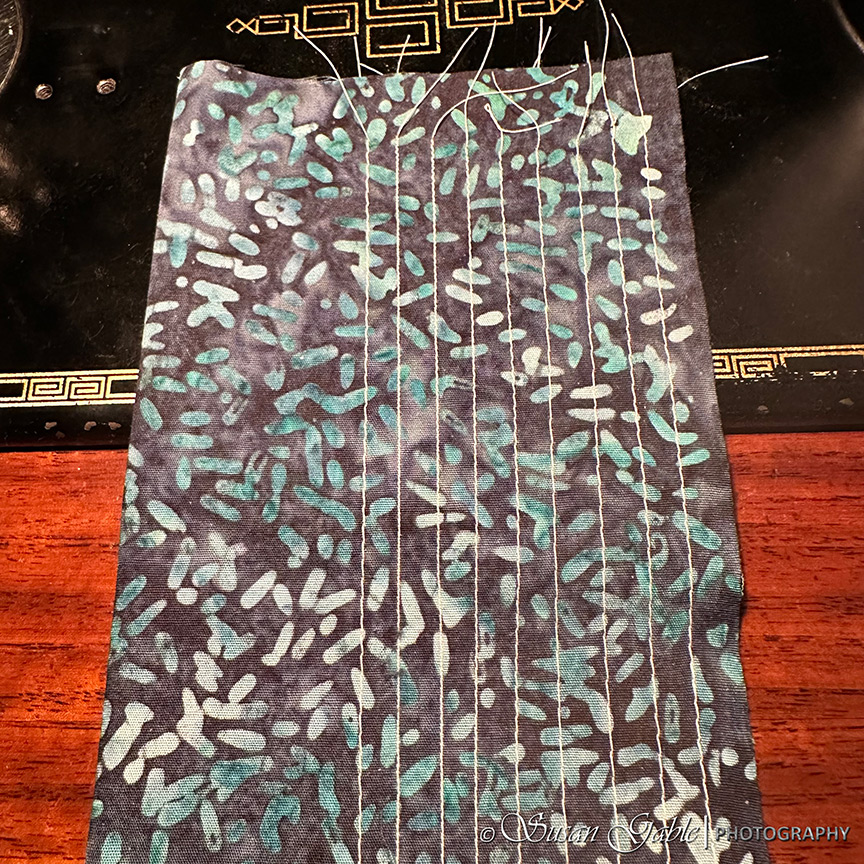
I need to find some plain colored fabric to create a true test of the stitches. I’m seeing some top thread showing up a bit on the bottom side of my batik fabric. Will need to make some minor tension adjustments if the same stitches show up on plain color fabric.
In the meantime, here’s a close up view of the beautiful stitches. The last row shows 9 stitches/inch. The second to last row shows 30 stitches/inch. It’s so pretty!
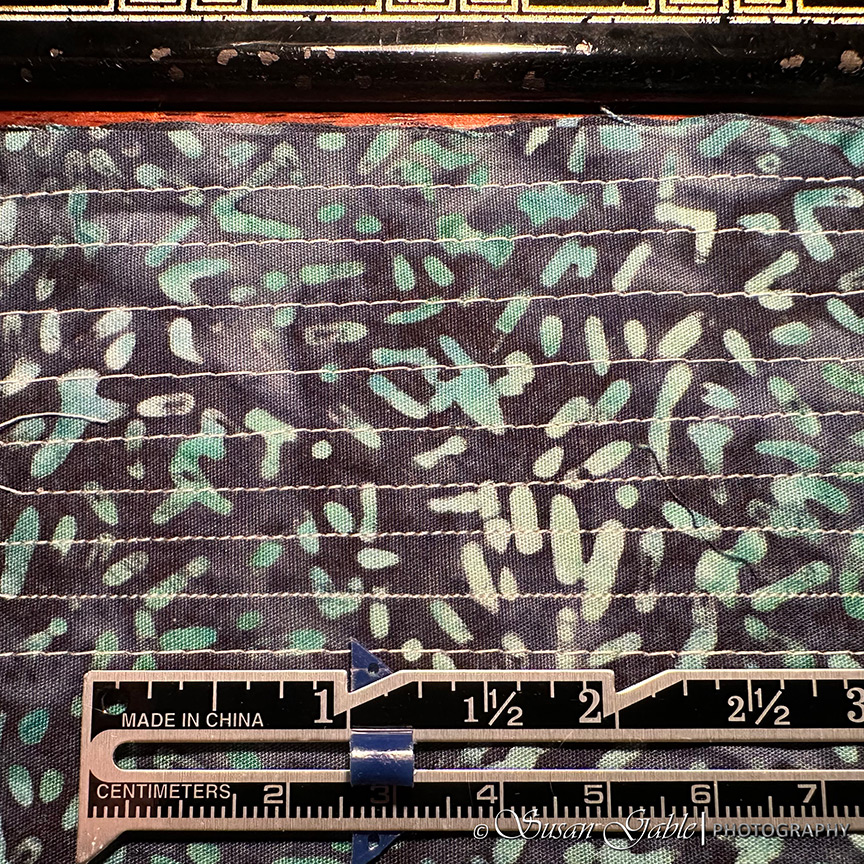
I’ve read the stitching speed tops out at around 1100 stitches per minute.
The Harp
I had to include a picture of my lovely Viking sewing machine. Last year, I was working on my Everest bag and had to create the quilted fabric before cutting the pieces and sewing it up. You can see the limited harp space I had to work with while quilting my fabric.
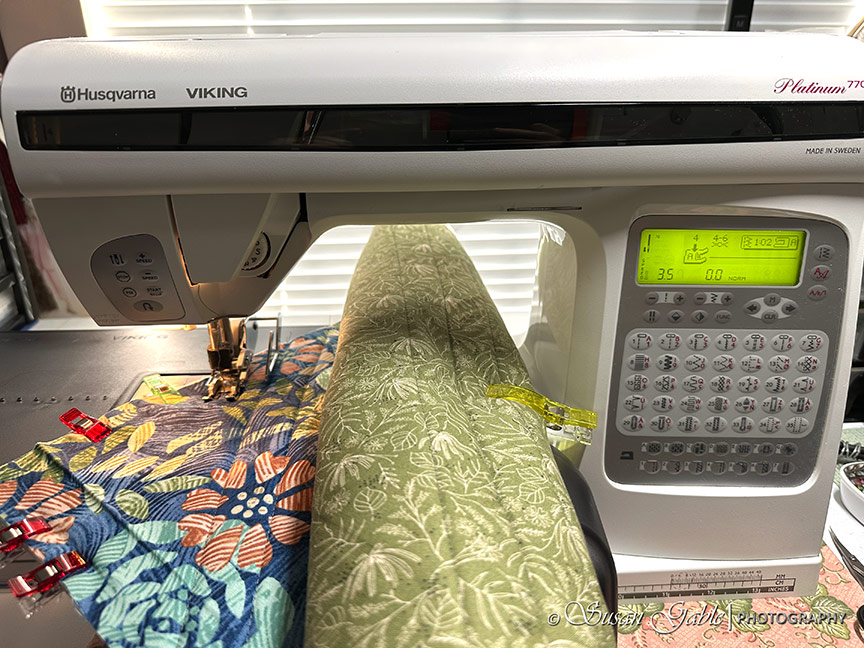
The harp size on my 201 is wider and so much taller. I should not have any problems sewing larger pieces of fabric on my Singer.

Tip #2: When using modern cross-wound threads, I have to use a thread stand so the thread unwinds easily from the top of the spool. This is helpful when sewing fast. Otherwise, the thread spool will jiggle around while unwinding/sewing.
My Thoughts
As I mentioned in the title of this blog post, this is my second vintage Singer machine. My first one was a 1938 Featherweight which needed a lot of love to get the machine to work. I ended up taking it apart and cleaning and oiling the moving parts that did not move and greasing the motor and gears. I also had to do a major cleaning of the chrome parts (tension dial, stitch lever/panel, wheel/clutch, sewing feet, etc) by removing them from the machine and then putting them back. All of this was a lengthy process and I gained valuable knowledge and experience. You can read about my Featherweight adventures here.
Another piece of information. My 201-2 is two months older than my Featherweight. They were both commissioned in 1938. Can you see the signs? It was meant to be.
I’m curious to see what the inside of my machine looks like. I plan on removing the side and back face plates and look for the areas that need oiling.
Right away, I can see there are a few chrome pieces (foot, thumb screws) that need to be cleaned and buffed. I also plan on applying some wax to my machine to give it some protection and shine it up a bit. I’m glad I’m able to reuse some products from my restoration purchases I made for my Featherweight.
The Singer 201s are well built sewing machines and made to last several lifetimes. I am so happy that I get a chance to continue and be a part of this machine’s sewing journey.
Machine: Singer 201-2. Commissioned on March 28, 1938. Elizabethport, NJ. There were other varieties built: 201-1 a treadle version, 201-2 (mine) electric potted motor, 201-3 electric with external belted motor, and the 201-4 that used a hand crank. The 201s were produced between 1935 and 1962.
My machine came with the original booklet, a few used bobbins with thread still on them, and the original standard straight stitch foot.
Cabinet: Singer #48 cabinet in walnut


Leave a comment